
Reasons to Choose Professional Microblading Services
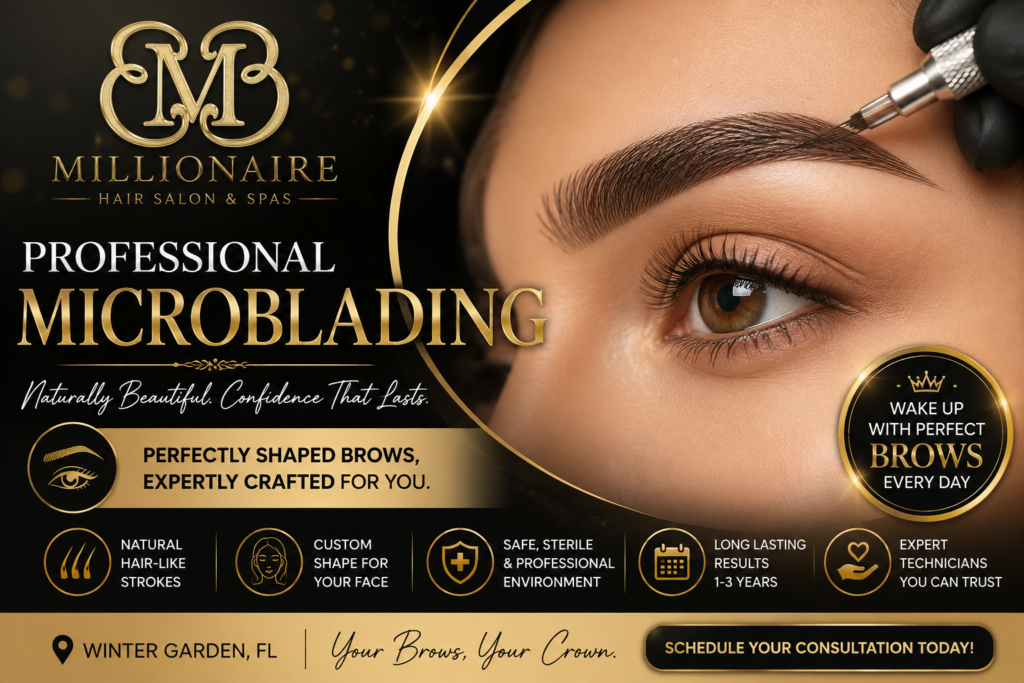
Eyebrows frame the entire face, and for clients dealing with sparse, over-plucked, or asymmetrical brows, microblading has become one of the most transformative services in the beauty industry. But not all microblading is created equal, and the difference between a professionally trained technician and an under-qualified one shows up on your face for months, if not years. Here is a thorough look at what microblading actually involves and why choosing a qualified professional matters more with this treatment than almost any other. What Is Microblading, Exactly? Microblading is a semi-permanent cosmetic tattooing technique that uses a handheld tool tipped with several tiny needles to create fine, hair-like strokes across the brow area. Unlike a machine-driven tattoo, microblading relies almost entirely on the technician’s hand control to determine the depth, angle, and placement of each individual stroke, which is what allows the results to look like natural brow hairs rather than a solid, drawn-on shape. The pigment is deposited into the upper layers of the skin, which is why results are considered semi-permanent rather than permanent, typically lasting between one and three years depending on skin type and lifestyle. Why Technician Skill Makes or Breaks the Result? Because microblading strokes are created by hand rather than by machine, the technique is remarkably operator-dependent. A skilled technician can create strokes so fine and precisely angled that they are nearly indistinguishable from natural brow hair, following your existing growth pattern and facial symmetry. An inexperienced technician, by contrast, can create strokes that are too thick, too uniform, or poorly angled, resulting in a blocky or unnatural appearance that is difficult to correct until the pigment fades. This is the single biggest reason to prioritize training and experience over price when choosing where to have this service done. The Documented Benefits of Choosing a Professional • Precise, hair-like strokes that follow your natural brow growth pattern • A customized shape mapped to your unique facial structure and symmetry • Sterile, single-use needle cartridges and medical-grade hygiene protocols • A thorough consultation process, including color matching to your skin undertone • Reduced risk of complications such as infection, patchy healing, or pigment migration • Consistent, predictable results because reputable technicians maintain rigorous training The Consultation and Mapping Process A professional microblading appointment begins long before the first stroke is applied. Your technician will assess your natural brow shape, growth pattern, and facial symmetry, then carefully map out the intended shape using measuring tools and reference points unique to your bone structure. Color is matched to your skin’s undertone and natural hair color, since pigment can shift subtly as it heals, and an experienced technician accounts for that shift when selecting the initial shade. This mapping process typically takes as long as the actual microblading itself, which is a strong sign of a technician who prioritizes precision over speed. Stage What Happens Typical Timing Consultation and mapping Shape design, color matching, numbing applied 30 to 45 minutes Microblading application Hand-applied hair-like strokes 45 to 60 minutes Initial healing Color appears darker, then flakes and softens 1 to 2 weeks Full healing Final color and texture settle in 4 to 6 weeks Touch-up appointment Refines shape and color saturation 4 to 8 weeks after initial session What Does the Healing Process Look Like? Immediately after your appointment, brows typically appear noticeably darker and more defined than the final healed result, which surprises many first-time clients. Over the following one to two weeks, the treated area will flake and shed as the skin heals, and the color will soften considerably during this time. A follow-up touch-up appointment, usually scheduled four to eight weeks after the initial session, allows your technician to fine-tune the shape and refine any areas where pigment retention was uneven, which is a normal and expected part of the process rather than a sign of a mistake. Hygiene and Safety Standards Matter Because microblading involves depositing pigment beneath the skin’s surface, hygiene protocols are not optional. Reputable professionals use single-use, sterile needle cartridges for every client, maintain a clean and sanitized workstation, and follow strict cross-contamination prevention procedures throughout the appointment. When researching a provider, do not hesitate to ask directly about their sterilization practices and certification; a confident, transparent answer is a strong indicator of a technician who takes this responsibility seriously. Who Is a Good Candidate for Microblading? Microblading works beautifully for clients with sparse, thin, or over-plucked brows who want a fuller, more defined shape without committing to daily makeup application. It is also a popular option for clients recovering from alopecia or chemotherapy-related hair loss who want to restore the appearance of natural brow hair. During your consultation, your technician will evaluate your skin type as well, since very oily skin can affect how crisply the hair-strokes heal, sometimes making a complementary technique like powder shading a better long-term fit. Longevity and Maintenance Because microblading is semi-permanent rather than permanent, results gradually soften over one to three years as the body’s natural exfoliation process slowly fades the pigment. Sun exposure, skincare routines involving strong exfoliating acids, and individual skin turnover rate all influence how long your results last. Most clients return for a touch-up appointment on a yearly or bi-yearly basis to maintain crisp, fresh-looking brows rather than allowing the color to fade completely before their next visit. Microblading Compared to Powder Brows and Other Options Clients researching brow enhancement often find themselves choosing between microblading and powder brows, and understanding the distinction helps clarify which is the better fit for professional needs. Microblading, applied with a hand-held tool, creates fine, individual hair-like strokes and tends to suit clients seeking a soft, natural, undone look, particularly those with drier skin types where the fine strokes heal crisply. Powder brows, applied with a machine, deposit pigment in a soft, shaded gradient similar to makeup, and tend to hold up better on oilier skin types where fine hair strokes might
Glycolic Acid Peels: Everything You Need To Know
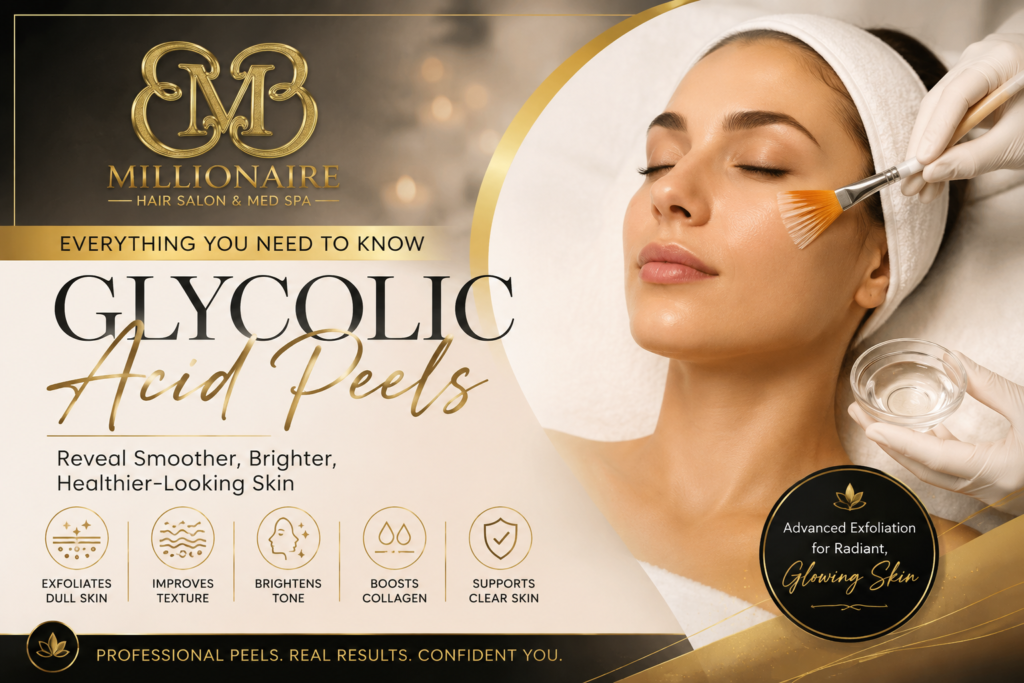
If dull, uneven, or tired-looking skin has become a recurring frustration, a glycolic acid peel is often one of the most effective and well-researched treatments a licensed esthetician can offer. It is a treatment with real clinical backing, decades of dermatological use, and a reputation among skincare professionals as the gold-standard alpha hydroxy acid. Here is a complete, professional breakdown of what glycolic acid actually does, what to expect from a peel, and how to keep your results glowing long after you leave the treatment room. What Is Glycolic Acid? Glycolic acid is an alpha-hydroxy acid, or AHA, naturally derived from sugar cane. Among the AHA family, which also includes lactic, malic, and citric acids, glycolic acid has the smallest molecular size. That matters clinically because a smaller molecule penetrates the skin more deeply and efficiently than larger AHAs, allowing it to work both on the surface and slightly beneath it. Dermatologists frequently describe it as the gold standard AHA precisely because of this superior penetration and its long track record of use in professional peels. How Glycolic Acid Works on the Skin? Glycolic acid functions as a chemical exfoliant rather than a physical, abrasive one. It works by dissolving the bonds that hold dead, keratinized skin cells together on the surface of the skin, a process known as desquamation. Once those bonds are loosened, the dulling layer of dead cells sheds more evenly, revealing smoother, brighter skin underneath. Because this process happens at a cellular level rather than through scrubbing, it tends to be gentler on the skin’s surface than mechanical exfoliation, even though the results are often more dramatic. The Documented Benefits of Glycolic Acid Peels • Targeted exfoliation that removes dulling, dead skin cell buildup • Stimulation of collagen production, supporting firmer, more resilient skin over time • Improvement in the appearance of fine lines and mild sun damage • A brighter, more even-toned complexion with reduced hyperpigmentation • A humectant effect that helps skin attract and retain moisture • Support for acne-prone skin by helping keep pores clear of debris Beyond exfoliation, glycolic acid has anti-inflammatory and antioxidant properties that make it useful for a range of skin concerns beyond dullness alone. Research has also shown that, at certain concentrations, glycolic acid can help inhibit the growth of bacteria on the skin, which is part of why it is frequently recommended for clients managing occasional breakouts alongside dullness or uneven tone. What Happens During a Professional Glycolic Peel? A professional-strength glycolic peel is applied by a trained esthetician at a concentration far higher than what is available in most at-home products, sometimes reaching up to 70 percent in a clinical setting. The peel solution is applied evenly to clean skin and left on for a controlled, precisely timed interval, typically just a few minutes, before being neutralized. You may feel a mild tingling or warming sensation during this window, which is a normal part of the exfoliation process rather than a sign of irritation. Concentration Range Typical Setting Best Use Case 5 to 10 percent At-home maintenance products Gentle, ongoing exfoliation between professional visits 10 to 20 percent At-home or light professional use Stronger anti-aging support, used less frequently Up to 70 percent In-office professional peel Controlled, deeper resurfacing performed by a trained esthetician Who Benefits Most From a Glycolic Peel? Clients dealing with dullness, uneven texture, mild sun damage, early fine lines, or occasional breakouts tend to see the most noticeable improvement from a series of glycolic peels. Because the treatment is customizable in strength and frequency, it can be adapted for a wide range of skin concerns and most skin types, which is part of why it remains one of the most requested professional facial treatments year after year. Building a Peel Series for Best Results A single glycolic peel can deliver an immediate glow, but the most meaningful improvements in texture, tone, and fine lines tend to build over a series of treatments performed several weeks apart. This spacing allows the skin adequate time to regenerate between sessions while steadily improving with each visit. Your esthetician will recommend a personalized schedule based on your skin’s response to the initial treatment and your specific goals. Aftercare That Protects Your Results Because glycolic acid removes the outermost layer of skin cells, treated skin becomes temporarily more sensitive to the sun. A broad-spectrum sunscreen is non-negotiable in the days and weeks following a peel, and tanning beds should be avoided entirely while your skin recovers. Keeping skin well hydrated with a gentle, fragrance-free moisturizer also supports the healing process and helps extend the glow of your results between appointments. • Apply broad-spectrum SPF daily, especially in the first week after treatment • Avoid tanning beds and prolonged direct sun exposure while skin recovers • Use a gentle, fragrance-free moisturizer to support the skin barrier • Hold off on additional exfoliating products until your esthetician clears you • Stay consistent with your peel series for the most noticeable results Why a Professional Setting Matters? At-home glycolic products are a wonderful maintenance tool, but they cannot replicate the controlled strength, precise timing, and neutralization process of a professional peel performed by a trained esthetician. A professional setting also allows for a customized approach, adjusting concentration and contact time based on how your specific skin responds, something a pre-formulated at-home product simply cannot do. Common Questions About Glycolic Peels New clients considering their first professional peel often have similar concerns. Will my skin visibly peel afterward? At professional strengths used for surface-level peels, visible flaking is typically minimal to moderate, appearing more like light dryness than the more dramatic peeling associated with deeper chemical peels. Can I wear makeup immediately after? Most estheticians recommend waiting several hours to allow the skin to settle, and using clean, non-comedogenic products when you do apply makeup again. Is one
Slim Your Double Chin: The Power of Kybella Injections
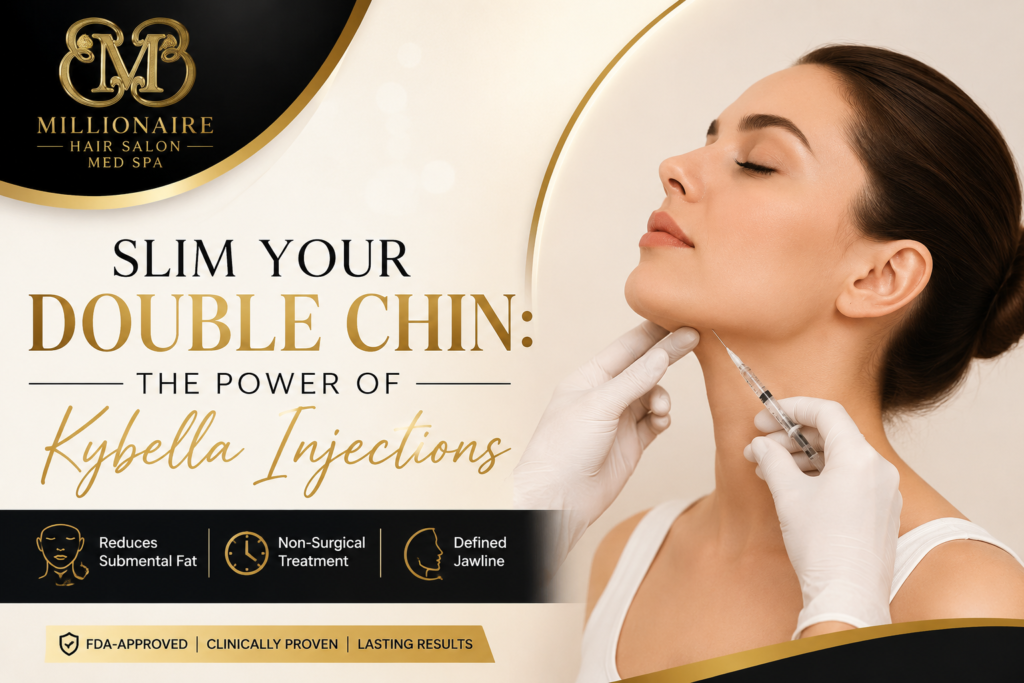
Submental fullness, more commonly known as a double chin, is one of the most persistent cosmetic concerns clients bring to our med spa. It resists diet and exercise in a way that frustrates even the most disciplined clients, largely because the fat pad beneath the chin is often influenced by genetics and the natural aging process rather than overall body weight. Kybella has changed the conversation around this concern by offering a non-surgical, injectable option with a clear clinical track record. Here is what the science actually says, and what to expect if you are considering treatment. What Is Kybella? Kybella is an FDA-approved injectable treatment that uses a synthetic form of deoxycholic acid, a substance the body naturally produces to help absorb dietary fat. When injected into the tissue beneath the chin, it targets and destroys fat cell membranes in that specific area. Once those cells are broken down, the body naturally absorbs and eliminates them over the following weeks. The Food and Drug Administration approved Kybella in 2015, making it the first and, for years, the only injectable treatment specifically indicated for reducing submental fat. How Does Kybella Actually Work? The active ingredient, deoxycholic acid, disrupts the structure of fat cell membranes at the injection site. Because the fat cells themselves are destroyed rather than simply shrunk, the results are considered long-lasting; once a fat cell is eliminated from the body, it does not return. This is a key distinction from weight-loss methods that shrink fat cells without eliminating them, which is why regained weight can sometimes bring volume back to areas treated through diet alone. With Kybella, the treated fat cells are gone for good, though maintaining a stable weight afterward supports the long-term appearance of results. What to Expect During a Treatment Session? • A licensed provider maps and marks the treatment area beneath the chin • A topical numbing agent is applied to minimize discomfort • The provider administers a series of small injections across the treatment zone • A typical session lasts approximately fifteen to thirty minutes • Most treatment plans involve multiple sessions spaced several weeks apart The exact number of injections and sessions depends entirely on the amount of submental fat present and the results a client is hoping to achieve, which is why an in-person consultation is essential before any treatment plan is finalized. Every chin profile is different, and a qualified provider tailors the approach accordingly rather than applying a one-size-fits-all protocol. The Realistic Timeline for Results Kybella works gradually, not overnight. Because the treatment relies on the body’s own processes to clear away destroyed fat cells, visible improvement typically unfolds over the course of several weeks following each session, with many clients seeing their fullest results after completing their full series of treatments. Swelling in the days following treatment is a normal and expected part of the process, as the body responds to the targeted area, and it generally subsides as the weeks progress. What to Expect Typical Timeframe In-office session length 15 to 30 minutes Initial swelling 1 to 2 weeks First visible changes Several weeks after a session Full results after final session Approximately 2 to 4 months Typical number of sessions 2 to 4, spaced weeks apart Who Is a Good Candidate for Kybella? Kybella is approved for adults dealing with moderate to severe submental fat, particularly those who have not achieved the results they want through diet and exercise alone. It is intended specifically for the area beneath the chin, and its safety and effectiveness have not been established for use in other areas of the body. During your consultation, our medically trained provider evaluates your chin profile, skin elasticity, and overall health history to determine whether Kybella is the right fit or whether an alternative approach might serve you better. Why a Medically Supervised Setting Matters? Because Kybella is an FDA-regulated prescription treatment, it should only be administered by a trained and licensed medical professional who understands facial and neck anatomy in depth. At Millionaire Hair Salon’s med spa in Winter Garden, our aesthetic treatments are overseen by Paula Pando, MSN, ARNP, CRNA, whose advanced clinical training ensures every injectable service is performed with precision, safety, and a thorough understanding of your individual anatomy. This level of oversight is not a luxury; it is the standard that separates a safe, effective treatment from an inconsistent one. Combining Kybella With Other Treatments Many clients pair Kybella with complementary skin treatments to enhance the overall result of a more contoured, defined profile. Because Kybella addresses fat volume specifically, it does not tighten skin, so clients with mild skin laxity around the jawline sometimes choose to combine treatment with skin-tightening or collagen-stimulating services for a more comprehensive outcome. During your consultation, our team can walk through which combination, if any, makes sense for your specific goals. Setting Realistic Expectations Kybella is a powerful tool, but it is not a substitute for significant weight loss, nor is it designed to address loose skin caused by aging or major weight fluctuations. It is most effective for clients whose primary concern is a persistent, isolated pocket of fat beneath the chin that has not responded to lifestyle changes. Understanding this distinction upfront leads to a far more satisfying outcome, which is why every consultation at our med spa begins with an honest conversation about what the treatment can and cannot do for your unique profile. Frequently Asked Questions About Kybella Clients considering Kybella for the first time tend to ask a similar set of questions during consultation. Is the treatment painful? Most clients describe the sensation as mild discomfort rather than significant pain, especially with topical numbing applied beforehand, though some swelling, bruising, and tenderness are expected in the days following treatment. How soon can I return to normal activities? Most clients resume their regular routine the same day or the following day, though visible swelling may take one
First-Time Blonde in Your 30s: What to Ask Your Stylist?
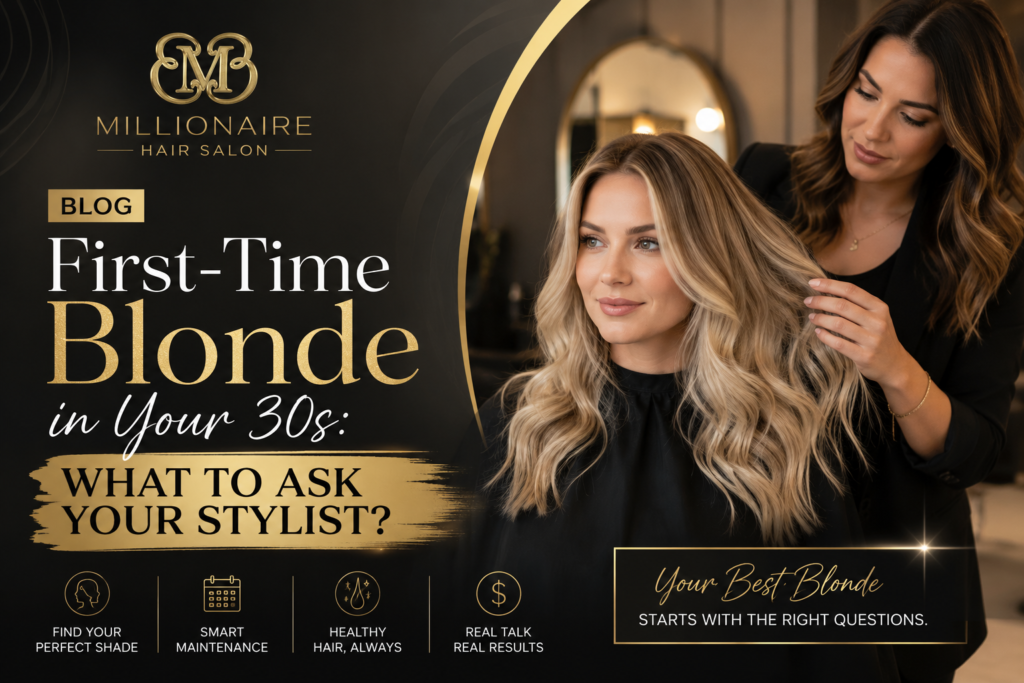
Going blonde for the first time is an entirely different experience in your thirties than it might have been at twenty. Your hair has a different history, your skin tone reads differently in cooler versus warmer light than it once did, and your lifestyle likely leaves less room for high-maintenance upkeep. None of that means blonde is off the table. It simply means the conversation with your colorist needs to be more strategic. As a salon built around blonding and dimensional color, we walk first-time blonde clients through this exact process nearly every week, and the questions below are the ones that consistently lead to the best outcomes. Why Going Blonde in Your 30s Requires a Different Approach? Hair that has never been lightened behaves differently than hair with a color history, and hair in your thirties often carries more of both. Natural graying may already be starting, which changes how pigment lifts and how toner reads once applied. Your hair may also be coarser or finer than it was a decade ago, affecting how quickly it processes. A first-time blonde transformation should never be rushed into a single sitting if your hair has significant unknowns, and an experienced colorist will tell you that upfront rather than promising a one-visit miracle. Question 1: What Level of Blonde Actually Suits My Skin Tone? Not all blondes are created equal, and the single biggest mistake first-timers make is choosing a shade because they liked it on someone else rather than because it complements their own undertone. Warm skin tones generally harmonize with golden, honey, and caramel-kissed blondes, while cool undertones tend to look most natural with ash, beige, or platinum tones. Ask your stylist to hold swatches near your face in natural light, not just under salon lighting, since fluorescent bulbs can distort how a shade will actually look once you walk outside. • Warm undertones: honey, caramel, golden blonde • Cool undertones: ash blonde, beige blonde, icy platinum • Neutral undertones: nearly any blonde family, with room to experiment • Ask to see swatches in daylight, not only under salon lighting Question 2: How Many Sessions Will This Realistically Take? If you currently have virgin, unprocessed hair in a medium to dark brown, moving to a noticeably lighter blonde is very likely a multi-session process. Lightening hair too aggressively in one visit increases the risk of damage and breakage, and a responsible colorist will pace the lift over several appointments spaced weeks apart to protect the integrity of your strands. Ask directly: “Based on my hair’s current color and condition, how many sessions do you expect this to take, and what will each one accomplish?” A vague answer here is a signal to ask more questions before committing. Question 3: What Will This Do to the Health of My Hair? Lightening hair lifts natural pigment out of the cortex, which can leave strands more porous and prone to dryness if not properly cared for. This is a normal part of the blonding process, not a sign that something has gone wrong, but it does mean your at-home routine needs to change. Ask your stylist what bond-building treatments they use during the service, since these formulas work to protect the internal hair structure during lightening. Also ask what products you should switch to at home, since regular shampoo and conditioner are rarely enough to maintain hair that has gone through a lightening service. Question 4: How Do I Prevent Brassiness Between Appointments? Blonde hair, especially warmer or previously colored hair, tends to pull brassy or yellow-toned as it grows out and is exposed to sun, chlorine, and hard water. Ask your stylist which purple or blue-toned shampoo they recommend for your specific shade, and how often you should actually use it, since overuse can leave hair looking flat or overly cool-toned. This is also a good moment to ask about heat protection, since blonde hair that has been lightened is more vulnerable to heat damage from styling tools than hair that hasn’t been processed. Question 5: What Is the Maintenance Schedule and Real Cost Over Time? Blonde is one of the more maintenance-intensive color categories, and it is worth understanding the full picture before your first appointment rather than being surprised later. Ask how often you will need to return for root touch-ups, toning refreshes, and any bond-repair treatments, and get a realistic sense of the total investment over a year, not just the price of the first visit. Maintenance Task Typical Frequency Root touch-up Every 5 to 8 weeks Toner refresh Every 4 to 6 weeks Bond-repair treatment Every 3 to 4 weeks or as recommended Full color consultation review Every 3 to 4 months Question 6: Should I Consider Foilyage or Balayage Instead of a Full Color? For many first-time blondes in their thirties, a gradual, dimensional technique such as balayage or foliage is a gentler entry point than an all-over color. These techniques hand-paint or foil lightener onto sections of hair, creating a softer, more natural regrowth line that requires less frequent maintenance than a single-process blonde. Ask your colorist whether a dimensional approach might get you closer to the look you want with less commitment and less stress on your hair overall. Question 7: What Happens If I Change My Mind? It is worth asking your stylist directly how reversible the process is if blonde ultimately is not for you. Because lightening removes pigment rather than adding it, going back to your natural color usually involves a semi-permanent or permanent gloss rather than simply stripping the blonde away. Understanding this before you start helps set realistic expectations for the months ahead. Protecting Your Blonde From the Florida Sun and Pool Living in Central Florida adds a specific consideration to blonde hair maintenance that clients in cooler climates may not need to think about as carefully: near-constant sun exposure and frequent time in chlorinated or salt water. UV exposure can
Celebrities Who Rocked Fringes- And How You Can Too!

Few hair decisions cause as much hesitation as the fringe. It is dramatic, it is committed, and once the scissors start, there is no quiet way to undo it. Yet some of the most iconic looks in film and music history have been built around a fringe. From Bardot’s face-framing wisps to Zendaya’s sleek, curtain-parted bangs on the red carpet, fringes have proven again and again that they can transform a look without overwhelming it. This guide walks through the fringe styles that have defined recent pop culture moments and shows you how to translate that same energy into a cut that fits your face, your hair texture, and your everyday life. Why Fringes Keep Coming Back Into Style? A fringe does more work than almost any other single hair decision. It can shave years off a look, soften a strong forehead, draw attention to the eyes, or completely change the personality of an otherwise simple haircut. Because it sits directly in your field of vision, it is also one of the few style choices you interact with constantly, which is part of why it feels so significant. Celebrities gravitate toward fringes for the same reason regular clients do: a great fringe reads as intentional, polished, and a little bit fearless. The Curtain Fringe: Soft, Face-Framing, Endlessly Wearable The curtain fringe, parted down the middle and swept to either side, has become one of the most requested styles in salons over the past several years, largely thanks to red carpet appearances from stars like Zendaya and Alexa Chung. Its appeal lies in its versatility. Because the fringe blends into the rest of the hair rather than being cut in one blunt line, it grows out gracefully and works across nearly every face shape, from round to oblong. It softens a strong forehead, adds movement around the cheekbones, and can be styled sleek and glossy or loose and beachy depending on the occasion. • Flatters oval, heart, and diamond face shapes especially well • Requires minimal daily maintenance compared to a blunt fringe • Grows out into face-framing layers rather than an awkward stage • Works with straight, wavy, and curly textures alike The Blunt, Full Fringe: Bold and Editorial A full, blunt fringe cut straight across the brow is the boldest version of the trend, popularized by icons like Zooey Deschanel and revived more recently by stars including Dakota Johnson and Bella Hadid for high-fashion moments. This style draws the eye instantly to the eyes and cheekbones, and it works best on oval and long, narrow faces that can handle the visual weight sitting at the top. Because it requires precise, regular trims to maintain its clean line, most stylists recommend committing to a maintenance schedule of every three to four weeks. The Wispy, Textured Fringe: Effortless and Low-Maintenance Actresses like Margot Robbie and Florence Pugh have popularized a softer, wispier take on the fringe, cut with texturizing shears rather than a blunt line. The result feels undone in the best way, with pieces that separate naturally and blend into longer layers around the face. This version is particularly forgiving for fine or thin hair, since the broken-up ends create the illusion of density without looking heavy. It also suits square and heart-shaped faces well, softening angular features without adding bulk at the forehead. The Side-Swept Fringe: A Subtle Introduction to Bangs For clients who want the framing effect of a fringe without a dramatic transformation, the side-swept version offers an easy entry point. Longer than a full fringe and angled to one side, this style has been a favorite of stars like Reese Witherspoon and Jennifer Aniston for decades because it photographs beautifully and requires the least amount of daily styling. It works particularly well on heart-shaped and diamond faces, minimizing forehead width while still adding softness around the eyes. Choosing the Right Fringe for Your Face and Lifestyle Fringe Style Best For Maintenance Level Curtain fringe Most face shapes, especially oval and heart Low to moderate Blunt full fringe Oval and longer face shapes High, frequent trims needed Wispy textured fringe Square and heart shapes, fine hair Low Side-swept fringe Heart and diamond shapes Very low Before booking a fringe appointment, think honestly about your styling habits. A blunt fringe looks incredible on camera, but it demands regular touch-ups and daily attention with a round brush or flat iron to keep it lying flat. A curtain or wispy fringe, on the other hand, can be styled in under a minute and still photographs beautifully. Your natural hair texture matters too. Very curly or coily hair can absolutely wear a fringe, but the cutting technique and length need to account for how much the hair will shrink once it dries. Preparing for Your Fringe Consultation A successful fringe starts long before the scissors come out. Bring photos of the specific silhouette you like, not just a celebrity name, since the same word “fringe” can describe dramatically different results depending on density and cutting technique. Be upfront about your cowlicks, your natural part, and how much time you realistically spend on your hair each morning. At Millionaire Hair Salon, our stylists always do a dry cut first for fringes, since hair behaves differently wet versus dry, and a fringe cut on damp hair can spring up shorter than expected once it fully dries. Growing Out a Fringe Gracefully If you decide a fringe is not for you long term, the good news is that most fringe styles grow out into face-framing layers rather than an awkward, in-between stage, especially if the initial cut was blended rather than blunt. Regular trims during the growing-out phase help maintain shape while length is added gradually, so you are never stuck with a look that feels unfinished. Fringes Across Different Hair Textures A fringe is often assumed to work best on straight hair, but that is a myth worth retiring. Curly and coily hair can
Best Haircuts for Different Face Shapes | Complete Guide
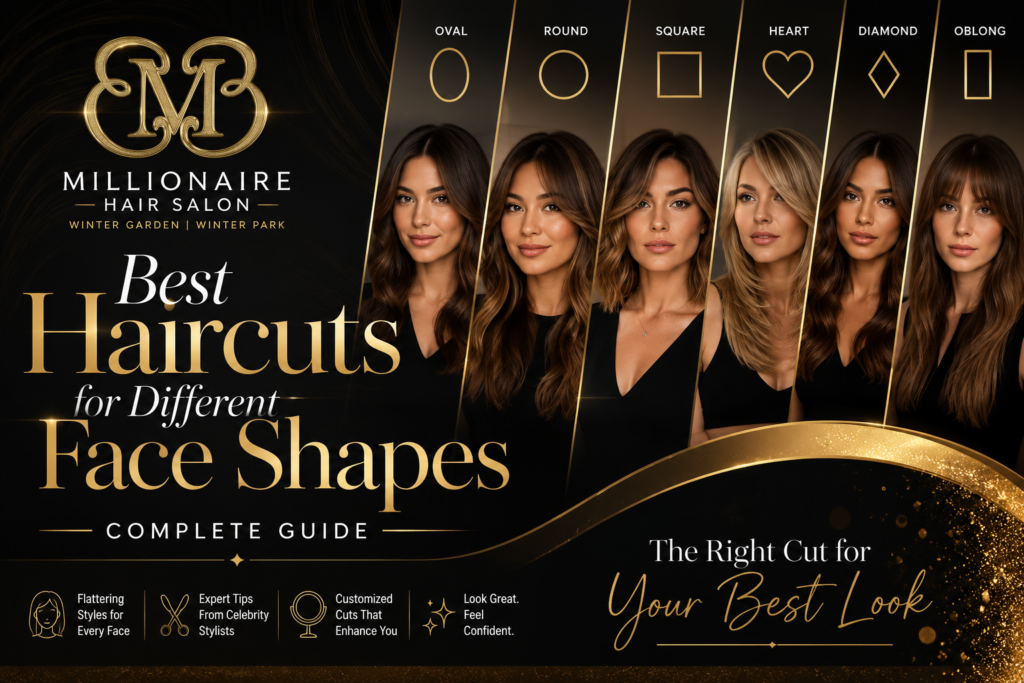
Choosing a haircut based on trends alone is how most bad salon experiences start. The style that looks stunning on a magazine cover or a TikTok tutorial was almost certainly cut to flatter a face shape that may be nothing like yours. At Millionaire Hair Salon in Winter Garden and Winter Park, our stylists begin every cut with the same question: what does this particular face need? The answer determines the length, the layers, the fringe, and even the part. This guide breaks down the science and the styling behind matching a haircut to a face shape, so your next appointment starts with a plan instead of a guess. Why Face Shape Should Drive Your Haircut Decision? A haircut is essentially an optical illusion tool. Hair can add width where a face is narrow, create the appearance of length where a face is short, and soften angles that feel too sharp. Estheticians and stylists typically classify faces into six general categories: oval, round, square, heart, diamond, and oblong. Identifying which category best describes your face involves comparing the width of your forehead, cheekbones, and jawline against the overall length of your face, usually by pulling your hair back and looking straight into a mirror under even lighting. None of these categories are rigid boxes. Most people are a blend of two shapes, and a skilled stylist reads the whole picture: bone structure, hair density, hairline shape, and even how you naturally part your hair. That is why an in-person consultation always outperforms a printed chart, but understanding the general principles below will help you have a much more productive conversation in the chair. Oval Faces: The Most Versatile Canvas Oval is widely considered the most balanced face shape because its proportions allow nearly any length or texture to work. Long layers add movement without disrupting the natural symmetry, while a sleek, middle-parted bob emphasizes the jawline and cheekbones beautifully. A full, blunt fringe is also an excellent option for oval faces, framing the eyes and adding a touch of drama. Because there is little correcting to do, this is the one face shape where a client can genuinely chase a trend without worrying about proportion. Round Faces: Creating Length and Definition The goal for a round face is to introduce vertical lines and remove visual width at the cheeks. Long layers that start below the chin elongate the face, and a deep side part breaks up the symmetry that can otherwise emphasize roundness. Face-framing pieces that graze the jaw draw the eye downward and outward rather than straight across the widest part of the cheek. Textured, angular layers below the chin work especially well, as does volume concentrated at the crown rather than the sides, which visually stretches the face. • Long layers starting at or below the jaw • Deep side parts instead of a centered part • Face-framing pieces angled toward the chin • Volume built at the crown, not the width of the cheeks • A textured, longer bob rather than a rounded, jaw-length one Square Faces: Softening Strong Angles A square jawline is a striking feature, and the right haircut enhances it rather than fighting it. Soft, wavy layers and side-swept bangs introduce curves that balance the straight lines of the jaw and forehead. A shag with wispy, textured ends is particularly flattering, as the broken-up pieces disrupt the geometry of the face. Sharp, blunt cuts and center parts tend to reinforce the angularity, so most stylists steer square-shaped clients toward rounded layers and asymmetry instead. Heart Faces: Balancing a Wider Forehead Heart-shaped faces are widest at the forehead and narrow toward the chin, sometimes with a visible widow’s peak. The objective here is to add width or softness near the jawline while minimizing bulk at the temples. A chin-length bob or lob draws attention downward to the cheekbones and gives the illusion of a fuller jaw. Side-swept fringes are a favorite for this shape because they soften the forehead without adding the width that a full, blunt fringe would create. Diamond Faces: Highlighting Dramatic Cheekbones Diamond face shapes have narrow foreheads and jawlines with cheekbones as the standout feature. Styles that add width at the forehead and chin, such as soft waves or a shoulder-length cut with curtain bangs, create balance across the whole face. Long, center-parted styles also work exceptionally well, since a sleek, straight-down silhouette echoes the natural symmetry of the shape. Heavy, blunt, straight-across bangs are typically avoided, as they can make the cheekbone area look even wider by contrast. Oblong Faces: Adding Width, Not Length Oblong faces share many traits with oval but are longer overall, so the priority shifts to creating width rather than length. Waves and curls add horizontal volume that shortens the visual length of the face, and a fringe, whether full or side-swept, breaks up the forehead and interrupts the vertical line running from hairline to chin. Shoulder-length cuts with soft layers tend to outperform very long, straight styles, which can exaggerate the length even further. Working With Your Stylist for the Best Results Bring reference photos, but be open to adjustments. A style that flatters a similar face shape on someone else may still need tweaking based on your hair density, texture, and natural growth pattern. At Millionaire Hair Salon, every haircut consultation includes a conversation about your daily styling routine and lifestyle, because the most flattering cut on paper only works if it is realistic for you to maintain. Our stylists, trained under celebrity stylist Jamila Burns-Sluder, combine face-shape analysis with an understanding of how hair falls and moves once you leave the chair, not just how it looks in the mirror. Common Mistakes to Avoid When Choosing a Haircut for Your Face Shape • Do not rely solely on a single celebrity photo without accounting for your hair’s texture and density • Avoid choosing a cut based purely on
Pedicure Cost in Florida: Why Foot Care Is a Year-Round Necessity?
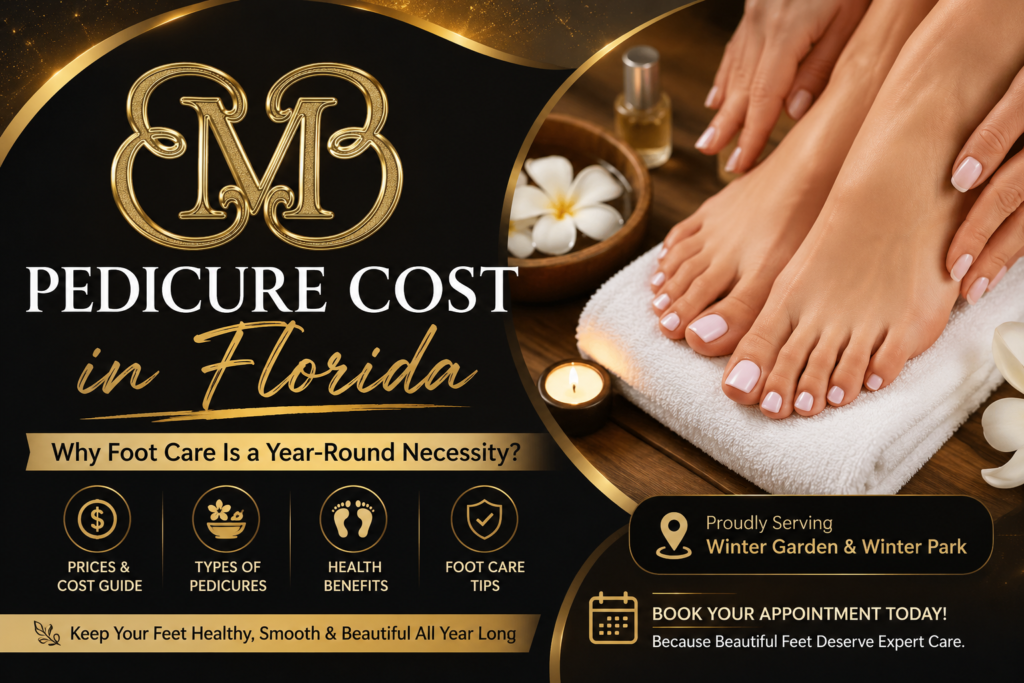
In Florida, where sandals, flip-flops, and barefoot beach days are part of everyday life, pedicures aren’t a luxury, they’re practically a necessity. Well-groomed feet and polished nails are a point of pride for Floridians who spend much of the year showing them off, and professional pedicures offer both the aesthetic and health benefits to keep your feet looking and feeling their best. How much does a pedicure cost in Florida? Let’s break down the pricing, what different services include, and why a professional pedicure is worth every dollar. Pedicure Prices in Florida Here’s a look at common pedicure service costs across Florida: • Basic pedicure: $25–$45 • Gel pedicure: $45–$75 • Spa pedicure: $45–$80 • Deluxe pedicure: $55–$100 • French pedicure: $35–$65 • Paraffin wax add-on: $10–$20 • Callus removal treatment: $10–$25 • Nail art (toes): $5–$20 per design In full-service salons and nail boutiques in areas like Winter Garden and Winter Park, pricing reflects the level of service, the products used, and the expertise of the nail technician. Types of Pedicures Basic Pedicure: Includes a foot soak, nail trimming and shaping, cuticle care, light exfoliation, and polish application. A clean, affordable option for regular maintenance. Spa Pedicure: A more indulgent version of the basic pedicure. Includes extended massage, a scrub treatment, and often a moisturizing mask or wrap. Perfect for a relaxing self-care day. Gel Pedicure: Polish is applied in gel formula and cured with UV or LED light for a chip-resistant finish that lasts 3–4 weeks, much longer than regular polish. Deluxe Pedicure: The premium experience. Includes all the elements of a spa pedicure plus advanced treatments like paraffin wax, heated booties, an intensive callus-softening treatment, and extended massage. French Pedicure: The classic white-tip look on toes, polished, clean, and versatile for any occasion. Why Pedicures Are Especially Important in Florida? Florida’s combination of heat, sand, chlorinated pools, and saltwater ocean creates unique challenges for foot health: • Walking barefoot or in flip-flops leads to rougher, drier skin and callus buildup • Moisture from pools, ocean, and sweating in closed shoes can cause bacterial or fungal issues if feet aren’t properly cared for • Prolonged sun exposure can dry out the skin on feet, causing cracking and peeling • Florida residents show their feet far more than people in colder climates, requiring regular upkeep A regular pedicure schedule, every 3–4 weeks, keeps feet healthy, smooth, and polished year-round. What Affects Pedicure Costs in Florida? Professional pedicures range enormously in scope and price. Understanding the differences between service levels helps you choose the right appointment for your needs and budget on any given visit. Service Type: Deluxe and spa pedicures cost significantly more than basic services because they include additional steps and products. Callus Severity: Clients with significant callus buildup may require extra time or a specialized treatment add-on. Nail Condition: Thickened toenails, previous nail damage, or ingrown nails may require additional care and affect pricing. Product Quality: Salons that use premium foot care brands and paraffin treatments charge more for the elevated experience and results. Nail Art: Toenail art adds to the overall service time and cost but can turn a simple pedicure into a creative expression. How to Maintain Your Pedicure Between Appointments? • Moisturize feet daily, especially important in Florida’s drying heat • Exfoliate with a pumice stone in the shower weekly to manage callus regrowth • Apply a protective top coat every few days over regular polish to prevent chipping • Wear flip-flops in public pools and locker rooms to protect against fungal exposure • Rinse feet after swimming in the ocean or pool to remove salt and chlorine • Keep nails trimmed straight across to prevent ingrown toenails The Health Benefits of Regular Pedicures Beyond aesthetics, professional pedicures offer genuine health benefits: • Regular exfoliation prevents callus buildup and cracked heels • Cuticle care reduces the risk of infection and nail issues • Foot massage improves circulation, especially beneficial in Florida’s heat • Early detection of nail or skin problems by a professional technician • Moisturizing treatments prevent dryness and peeling At Millionaire Hair Salon, we maintain strict sanitation protocols that exceed Florida state standards. All tools are either single-use or professionally sterilized between clients. Our foot baths are thoroughly cleaned and disinfected before each appointment. We believe that a pedicure should leave your feet healthier and safer, not expose them to any additional risk. Book Your Appointment Give your feet the professional care they deserve, all year long. At Millionaire Hair Salon in Winter Garden and Winter Park, we offer the full spectrum of professional pedicure services in a clean, relaxing, and thoroughly professional environment. Whether you’re preparing for a special event or maintaining your regular care routine, we’re ready to help your feet look and feel their absolute best. Book your pedicure appointment today by calling either of our locations or scheduling online through our website.
A Complete Guide to Manicure Cost in Florida
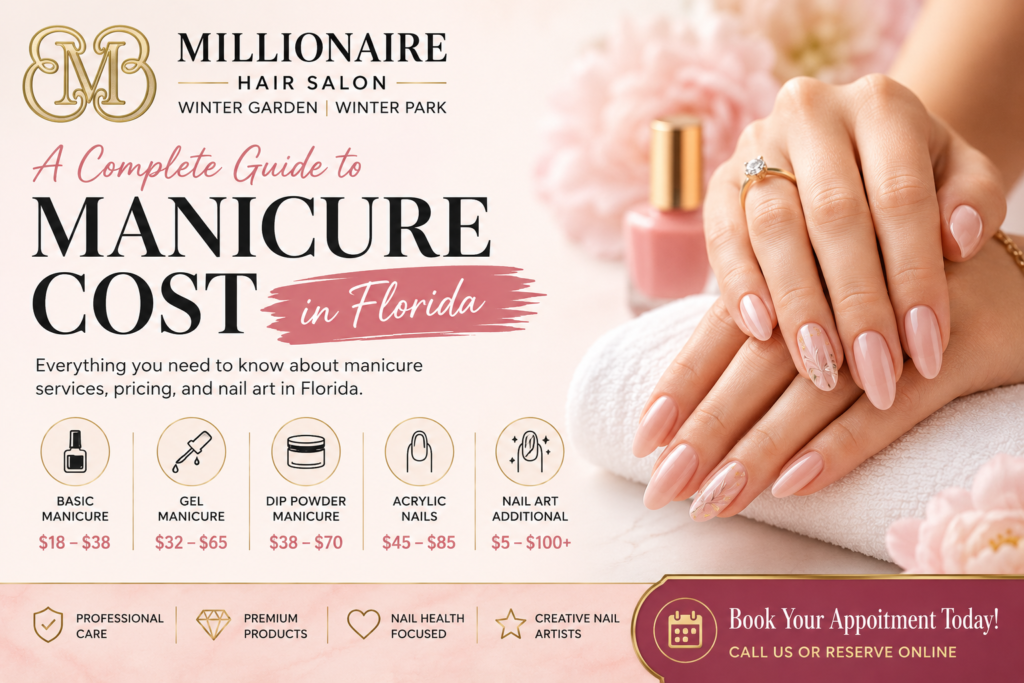
In a state where summer is the default season and shorts, sundresses, and open-toed sandals make up the year-round wardrobe, your hands are always on display. A polished, well-maintained manicure is one of those details that communicates care and attention, it’s the kind of finishing touch that elevates your entire appearance, whether you’re heading to a business meeting, a beachside brunch, or a wedding on the Gulf Coast. Florida’s salon market offers an enormous range of manicure services, from quick and affordable express polish changes to elaborate nail art sessions that take hours and function as genuine artistic expression. At Millionaire Hair Salon in Winter Garden and Winter Park, our nail technicians bring precision, creativity, and a thorough understanding of nail health to every single appointment. This guide walks through what manicure services cost in Florida, what each service involves, and how to get the most out of your nail investment. Types of Manicure Services and Florida Pricing The first thing to understand about manicure pricing is that the service type is the single biggest determinant of manicure cost in Florida. Different manicure techniques use different products, require different equipment, and last for different lengths of time. Choosing the right service depends on your lifestyle, your budget, and how long you want your manicure to hold before your next visit. A classic or basic manicure remains one of the most universally requested services. It includes nail shaping and filing, cuticle softening and cleanup, a hand massage with lotion, and the application of regular polish in your chosen color. Pricing at Florida salons generally runs from $18 to $38. While this service is the most affordable option, regular polish chips and wears within five to seven days, which in Florida’s active lifestyle can sometimes be even sooner. Gel manicures have largely become the new standard for clients who want longer-lasting results. A UV or LED-cured gel polish is applied in thin layers and cured between each coat, creating a glossy, chip-resistant finish that typically lasts two to three weeks without significant wear. Gel manicure pricing at Florida salons generally ranges from $32 to $65. Gel removal, when done safely by a professional, is typically $10 to $20 as a standalone service or included with a new gel appointment. Dip powder manicures use a different chemistry, the nail is coated in a bonding liquid and then dipped into a finely milled pigmented powder, repeated in layers to build color and strength. The result is an extremely durable finish, dip powder manicures often last three to four weeks, and the product itself is air-cured, requiring no UV light. Dip powder services in Florida typically cost between $38 and $70. Acrylic nails involve applying a liquid-and-powder mixture over the natural nail or a nail form to create an overlay or extension. Acrylics can be shaped to virtually any length or contour and are the most durable and customizable extension system available. Full acrylic sets in Florida generally run between $45 and $85, with fill appointments, needed every two to three weeks as the natural nail grows, priced between $28 and $50. Shellac is a brand-name hybrid gel-polish system that bridges the gap between regular polish and full gel, it applies like polish but cures under UV light, lasting approximately two weeks before natural wear. Shellac services typically run $32 to $55 in Florida. Nail Art: The Creative Side of Professional Manicures Nail art has experienced an extraordinary renaissance in recent years, and Florida’s creative, expressive culture has embraced it wholeheartedly. From subtle chrome powder finishes and minimalist geometric designs to full hand-painted florals and sculptural 3D elements, the range of artistic possibilities in today’s nail art is genuinely stunning. Manicure cost in Florida varies dramatically based on complexity. Simple designs, a single accent nail with a contrasting color, a delicate thin line, or a small floral detail, might add just $5 to $15 to the base service cost. More complex work, multiple detailed designs across all ten nails, intricate character art, or elaborate festival-inspired patterns, can add $30 to $100 or more depending on the time required. At Millionaire Hair Salon, our nail technicians include artists who are particularly passionate about nail art. We encourage clients to bring reference photos to their appointments so we can discuss what’s achievable and create a result that genuinely reflects your personal aesthetic. Why Professional Manicures Outperform DIY Every Time? At-home manicure kits, gel lamps, and dip powder systems have become widely available, and while they can produce passable results, they fall short of professional manicures in several important ways. Nail health assessment is something only a trained technician can provide. Our nail technicians are trained to identify early signs of nail problems, thin, peeling layers, nail plate separation, cuticle inflammation, or signs of fungal issues, and address them before they become serious. Untrained eyes applying product over compromised nails can actually trap bacteria and worsen underlying conditions. Precision is another significant advantage. A professional nail technician filing a perfectly even free edge, painting crisp lines with zero skin coverage, and applying product in consistently thin, even layers produces a result that genuinely looks different from what most people can achieve at home. The tools, products, and techniques available to professional technicians are simply better. Finally, the hand and arm massage included in most professional manicure services is genuinely beneficial for circulation, joint mobility, and stress reduction. For clients who work at computers all day, this brief but focused massage attention to the hands and forearms provides real relief, a benefit that’s simply unavailable from a DIY application. Keeping Your Manicure Looking Great Between Appointments Florida’s active lifestyle, gardening, cooking, swimming, outdoor sports, places constant demands on manicured nails. We share specific care advice with every client to help their results last as long as possible. Daily cuticle oil application is the single most impactful habit for nail health and manicure longevity. Cuticle oil penetrates the nail plate and surrounding skin, maintaining hydration that prevents cracking, peeling,
Waxing Cost in Florida: Your Guide to Smooth Skin
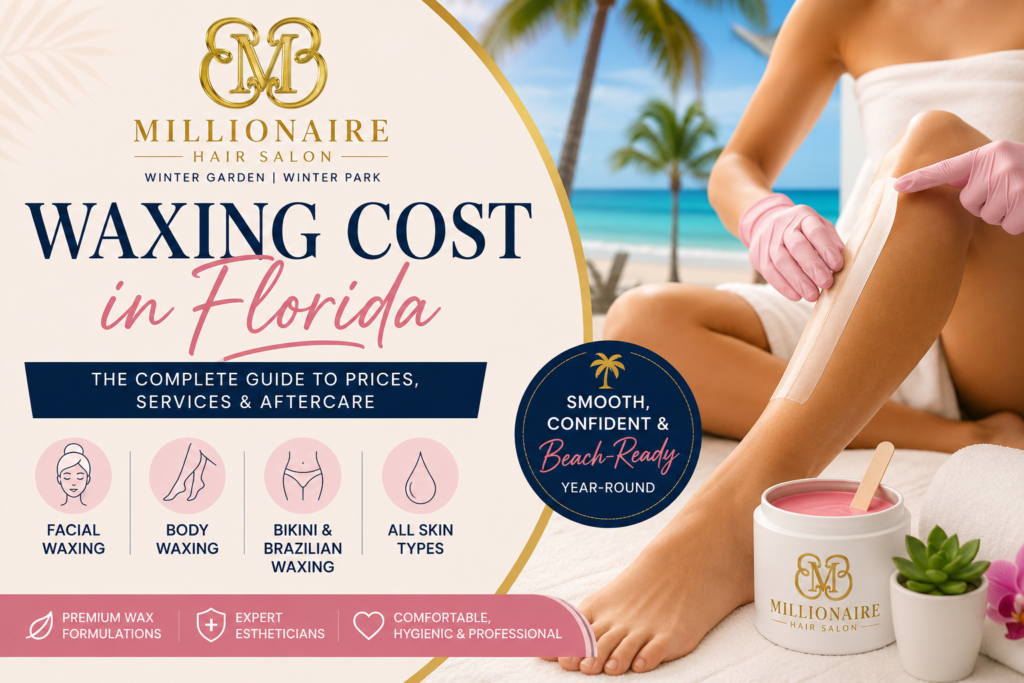
Florida is one of the few places in the world where summer never truly ends. When you live in a state where the temperature rarely dips below comfortable shorts-and-sandals weather, even in the depths of January, smooth, well-groomed skin isn’t a seasonal concern. It’s a year-round priority. This is exactly why professional waxing services thrive in Florida’s beauty market, and why so many residents have made salon waxing a regular part of their personal care routine. At Millionaire Hair Salon in Winter Garden and Winter Park, we offer professional waxing services in a comfortable, hygienic, and thoroughly professional environment. Our estheticians are trained in advanced waxing techniques for all skin types, with a particular emphasis on minimizing discomfort and preventing irritation, especially important given Florida’s heat and the skin sensitivities that can accompany it. A Complete Guide to Waxing Services and Pricing in Florida Waxing Cost in Florida cover virtually every area of the body, and pricing is generally determined by the size of the area, the type of wax used, and the salon’s overall service level. Here’s a thorough breakdown of what you can expect to pay. Facial waxing is among the most popular and frequently requested categories. Eyebrow waxing, the cornerstone service, typically runs $12 to $32. Upper lip waxing ranges from $8 to $22. Full face waxing, covering the forehead, cheeks, chin, lip, and sideburn areas, generally costs $40 to $70. Chin and sideburn waxing is typically $10 to $20 per area. Body waxing covers a much wider range of services and price points. Underarm waxing is typically $18 to $35. Half-leg waxing (either lower or upper leg) generally runs $32 to $60. Full leg waxing, one of our most popular services among Florida clients preparing for beach season, which is essentially always, ranges from $60 to $115. Arm (full) Waxing Cost in Florida between $35 and $65. Bikini and intimate waxing represents a highly requested category in Florida’s beach-centric culture. A basic bikini line wax, removing hair from outside the underwear line, typically costs $28 to $55. A French or extended bikini wax, which removes more hair from the sides and top, runs $35 to $65. A Brazilian wax, which removes all or most hair from the bikini area, is typically priced between $50 and $95 at Florida salons. Back and chest waxing for men and women generally falls between $40 and $90 depending on area size and hair density. Hard Wax vs. Soft Wax vs. Sugar Wax: Understanding Your Options Not all waxing methods are created equal. The best choice depends on the treatment area, your skin sensitivity, and your desired level of comfort. Understanding the differences between hard wax, soft wax, and sugar wax can help you select the option that delivers the best results for your needs. Feature Hard Wax Soft Wax Sugar Wax Application Method Applied warm and removed without strips Applied thinly and removed with cloth strips Applied at room temperature or slightly warmed Best For Face, underarms, bikini area Legs, arms, back, chest Sensitive skin and delicate areas Skin Sensitivity Gentle on sensitive skin More aggressive on skin surface Very gentle and suitable for sensitive skin Hair Removal Grips hair more than skin Removes fine and coarse hair efficiently Removes hair while minimizing irritation Comfort Level High Moderate Very High Additional Benefits Less irritation and redness Fast and effective for large areas Natural ingredients and light exfoliation Ideal Client Those seeking comfort in sensitive areas Those treating larger body areas Those with sensitive or eczema-prone skin Climate Suitability Performs well in warm, humid climates Effective in most environments Water-soluble and easy to clean up What Affects Waxing Cost at Florida Salons? Several variables influence how much you’ll pay for a waxing service beyond the base area pricing. Hair density and growth rate play a significant role, clients with coarser, denser hair growth may require more wax applications and additional passes to achieve complete removal, which affects the time and product cost. Skin sensitivity is another factor. Clients who require a gentler approach, such as those with reactive skin, rosacea, or post-laser skin, may need more time between wax applications and more careful technique, which experienced estheticians accommodate in the pricing. Consistency of waxing appointments also affects your experience over time. Clients who wax regularly, every three to five weeks, find that over time their hair regrows finer and sparser, making each session faster, more comfortable, and more straightforward. New clients or those returning after long gaps between services typically experience more discomfort and require more thorough initial sessions. At Millionaire Hair Salon, our estheticians always conduct a brief skin and hair assessment before beginning a waxing service. This helps us select the right wax type, identify any contraindications, such as retinoid use, which makes skin more vulnerable to wax injury, and set the right expectations for the appointment. Post-Wax Care in Florida’s Climate Florida’s warmth and outdoor culture create some specific post-wax care considerations that we always review with our clients before they leave the salon. Freshly waxed skin is temporarily more vulnerable to sun damage, heat irritation, and bacterial contamination, all of which are more prevalent concerns in Florida than in cooler climates. We recommend keeping waxed areas out of direct sunlight for at least 24 hours following a service. This is especially important for facial waxing, the face is almost always sun-exposed, and freshly waxed skin can hyperpigment more easily with UV exposure. We encourage all our clients to apply a broad-spectrum mineral SPF after any facial waxing service before leaving our salon. Swimming in pools or the ocean should be postponed for 24 to 48 hours post-wax, as both chlorine and salt can irritate open follicles. Wearing loose, breathable clothing after body waxing minimizes friction and prevents heat rash in Florida’s warm temperatures. A gentle, alcohol-free toner or soothing aloe gel can be applied to calm any post-wax redness. Book Your Appointment Stay smooth, confident, and beach-ready year-round. At Millionaire Hair Salon in Winter Garden and
Microblading Cost in Florida: The Complete Guide to Semi-Permanent Brows
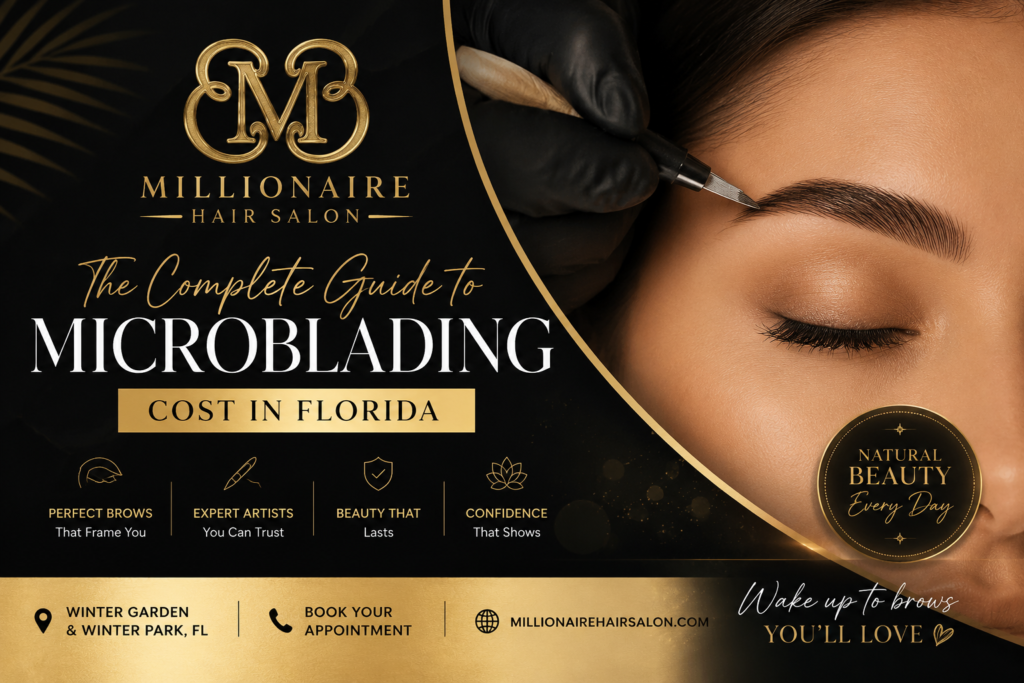
Your eyebrows frame your entire face. They communicate expression, define your facial structure, and, when done right, create an effortless sense of polish that no other beauty treatment quite replicates. For those who’ve spent years drawing in sparse brows, filling gaps, or wrestling with uneven arches before every mirror, microblading represents something genuinely liberating: waking up with beautiful, natural-looking brows already in place. In Florida, where heat and humidity make traditional brow pencils and pomades difficult to maintain throughout the day, microblading has become one of the fastest-growing beauty services in the state. At Millionaire Hair Salon in Winter Garden and Winter Park, we offer microblading and related brow-perfection techniques performed by certified artists who approach each face as an individual canvas. This guide walks you through what microblading is, what microblading cost in Florida, and everything you should know before booking your appointment. What Is Microblading, and How Does It Work? Microblading is a form of semi-permanent cosmetic tattooing performed with a handheld tool fitted with a row of ultra-fine needles. Unlike traditional tattoo equipment, which uses a motorized machine, microblading is done entirely by hand, a technique that allows the artist to create delicate, hair-like strokes with exceptional precision and control. During the service, the artist deposits pigment into the uppermost layers of the dermis, not as deep as a traditional tattoo, which is why the results are semi-permanent rather than permanent. Over twelve to twenty-four months, the pigment gradually fades as the skin naturally renews itself. This fade is actually one of the advantages of microblading over traditional brow tattooing: it allows the look to be refreshed and updated as beauty trends evolve and as the client’s face naturally changes over time. The microblading process begins with a consultation and brow mapping session, in which the artist measures the face’s natural proportions and sketches the intended brow shape using a removable mapping pencil. This step is collaborative, our clients are involved in reviewing and approving the design before any pigment touches their skin. Nothing proceeds until we are all in complete agreement about the shape, arch, and tail of the brow. Microblading and Related Techniques: What’s Available in Florida? Microblading is the most recognizable name in semi-permanent brow services, but it’s one technique within a broader menu of options that skilled artists now offer. Powder brows, sometimes called ombre brows, use a soft, stippled technique, either by hand or with a digital machine, to create a shaded, filled-in effect that mimics the look of brow powder or pomade applied professionally. The result is slightly more defined than microblading and tends to hold its pigment saturation longer, making it an excellent choice for oily skin types. Combination brows merge microblading strokes at the front and inner parts of the brow, where natural-looking hair strokes create the softest, most realistic result, with powder shading in the body and tail for added definition and depth. This technique is extremely versatile and often the recommendation our artists make for clients who want the most dimensional, natural-looking result possible. Nano brows use a digital machine fitted with a single ultra-fine needle to create strokes that are even more precise than traditional microblading. This technique is growing in popularity among clients with oily skin or mature skin with larger pores, as nano strokes tend to retain their definition better over time in these skin types. What Does Microblading Cost in Florida? Microblading Cost in Florida reflects the artist’s certification level, the technique used, and the overall level of the service experience. Here’s what you can realistically expect to invest: A standard microblading service, including the initial session and a touch-up appointment six to eight weeks later, typically ranges from $350 to $750 at reputable Florida studios. Powder and ombre brow services fall in a similar range, from $380 to $780 depending on the complexity of the look and the artist’s experience level. Combination brows are priced slightly higher, generally between $450 and $850, because they require mastery of two distinct techniques within a single appointment. Annual refresh appointments, also called color boosts, are needed to maintain the vibrancy and definition of your brows as the pigment naturally fades. These sessions typically run between $175 and $400, considerably less than the initial service because the brow shape is already established and only the pigment needs refreshing. At Millionaire Hair Salon, we are transparent about our pricing structure and what each service includes. We believe our clients deserve to know exactly what they’re investing in before they commit to an appointment. Microblading Aftercare in Florida: The Most Important Weeks of Your Results The first ten days after a microblading appointment are critical. How you care for your brows during the initial healing phase directly determines how well the pigment retains and how sharp the strokes remain once healed. In Florida’s climate, this healing period requires extra mindfulness. Moisture is the primary enemy of fresh microblading. The treated area should be kept completely dry for the first seven to ten days, this includes sweat, rain, and steam. In Florida’s heat and humidity, this can be genuinely challenging. We recommend our clients schedule their microblading appointments strategically, avoiding the hottest, most humid weeks of summer if outdoor activities or intense exercise are unavoidable parts of their routine. Swimming in pools, the ocean, or any body of water, should be avoided for a minimum of four weeks. Chlorine and salt accelerate pigment fading and increase infection risk in fresh skin. After the brows are fully healed, we strongly recommend applying a broad-spectrum SPF product around (not directly on) the brows whenever spending time in Florida’s intense sun, as UV exposure is the primary cause of pigment fading between refresh appointments. We follow up with every microblading client after their appointment to check on the healing process and answer any questions. Our commitment to your results doesn’t end when you leave our salon. Book Your Appointment Imagine waking up every day with perfectly shaped, natural-looking brows. At Millionaire