
How Much Do Fusion Hair Extensions Cost ?
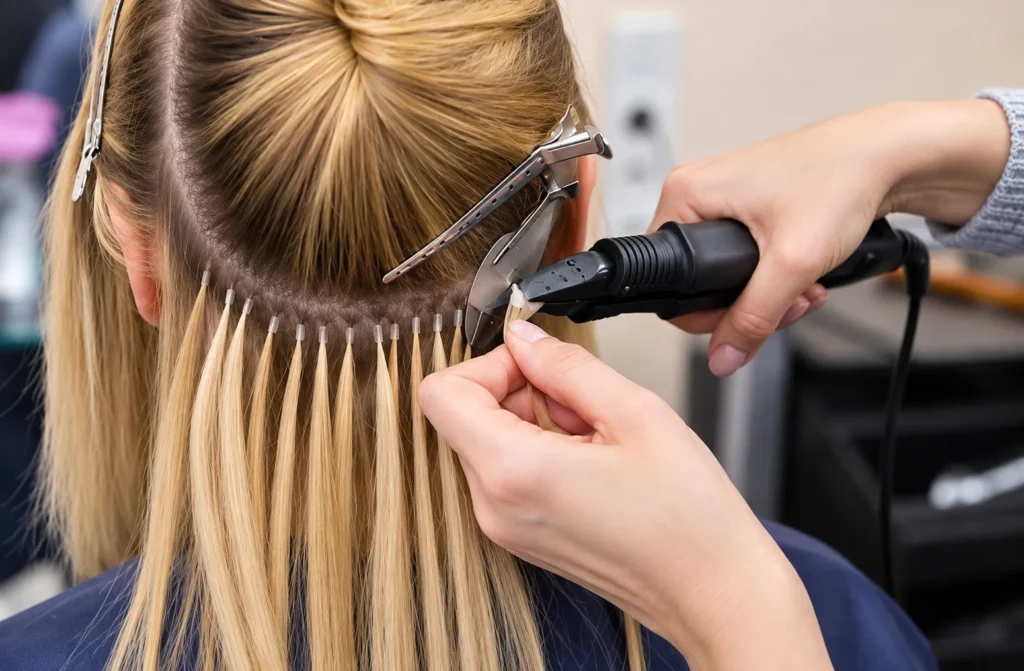
Fusion hair extensions remain one of the most requested methods for clients who want long-lasting, natural-blending results. Because the technique uses a bonding agent to attach each strand individually, pricing tends to run higher than clip-ins or halo styles, which is often the first thing new clients want clarity on. What Are Fusion Hair Extensions? Fusion extensions from Millionaire Hair Salon attach individual strands of hair to small sections of your natural hair using a bonding agent, most commonly a keratin adhesive that is melted with a heated tool. The result is a strong, discreet bond that sits close to the scalp and can be parted in any direction, making fusion one of the more versatile methods for styling flexibility. How Much Do Fusion Hair Extensions Cost in the USA? Nationally, a full head of fusion extensions typically ranges from $600 to $3,000, with most clients spending between $1,000 and $2,000 for a natural, full result using quality Remy hair. Pricing is generally influenced by the number of strands used, which can range from 100 to over 300 for a full, dense look. Some salons price fusion extensions per strand, often between $5 and $15 per strand including hair and labor, while others offer package pricing for a full head. What Factors Affect the Cost? ● Number of strands – More strands create more volume and coverage but directly increase the price. ● Hair length – Longer lengths use more hair per strand, raising the overall cost. ● Hair grade – Remy, double-drawn, or Russian/European hair costs more than standard blends but offers a more natural look and longer usable life. ● Stylist skill level – Fusion application is technically demanding, and experienced specialists often charge higher rates that reflect precision and reduced damage risk. ● Salon location – Pricing in larger metro markets tends to run higher than in smaller cities or towns. ● Removal cost – Some salons charge separately for professional removal, which uses a solvent to safely dissolve the bonds without pulling on natural hair. What Is Included in the Price? A standard fusion extension quote typically includes the consultation, the extension hair itself, the fusion application process, and a finishing cut and blend. Because removal is a separate, delicate process, it is worth confirming whether it is included in your original price or billed separately at your next appointment. How Long Do Fusion Extensions Last? A single fusion application generally lasts three to four months before the bonds need to be moved up. High-quality hair can often be reused for a second application after the bonds are removed and the hair is reconditioned, which can help offset the cost of future visits. How Often Do You Need Maintenance? Most clients need a move-up appointment every eight to twelve weeks as natural hair grows and the bonds shift further from the scalp. Delaying maintenance too long can cause tangling and added strain at the root, so staying close to the recommended schedule protects both comfort and hair health. Is Fusion Worth the Cost? Clients often compare fusion against tape-in or hand-tied options when budgeting for extensions. Tape-ins are generally faster to install and lower in labor cost, while fusion offers more versatility for up-dos and parting since there are no flat tracks to hide. The right choice usually comes down to lifestyle: fusion suits clients who want maximum styling freedom and are willing to invest more time and money into upkeep. Fusion extensions are often considered worth the investment for clients who want a long-lasting, highly natural-looking result that can be styled in any direction, including up-dos, without visible attachment points. The tradeoff is a longer, more technical installation process and a higher price point compared to no-heat methods like tape-ins or invisible beads. How to Choose the Right Salon ● Look for a stylist specifically trained in fusion or keratin-bond application, since the technique requires precise heat control to avoid damage ● Ask about the hair source and grade being used, since this significantly affects both cost and how natural the final look appears ● Request a clear price breakdown that separates hair cost, application labor, and future maintenance ● Make sure professional removal is discussed upfront, since improper removal is one of the most common causes of extension-related hair damage Tips to Save on Fusion Extension Costs ● Ask your stylist how many strands you truly need for your goals, since over-ordering hair adds unnecessary cost. ● Stick to the recommended eight-to-twelve week move-up schedule to avoid tangling that can shorten the usable life of your extensions. ● Have bonds removed professionally rather than at home, since improper removal can damage natural hair and reduce your ability to reuse the extension hair later. ● Ask about reuse policies, since salvaging your existing hair for a second install can meaningfully lower the cost of your next appointment. FAQs About Fusion Hair Extension Cost Is fusion more expensive than tape-in extensions? Fusion tends to cost more overall due to the labor-intensive, strand-by-strand application process, even when using similar quality hair to tape-ins. Can fusion extensions be reused? Yes, in many cases. If the hair is high quality and properly removed, it can often be reapplied for a second or even third set, which can reduce future costs. Does fusion damage natural hair? When applied and removed correctly by a trained professional, and maintained on schedule, fusion extensions should not cause significant damage. Most damage cases result from delayed move-ups or improper at-home removal attempts. How many strands are needed for a full, natural look? Most full-head applications use 150 to 250 strands, though this depends on your natural hair density and desired volume. Is fusion a good option for fine hair? Fusion can
How Much Do Invisible Bead Hair Extensions Cost?
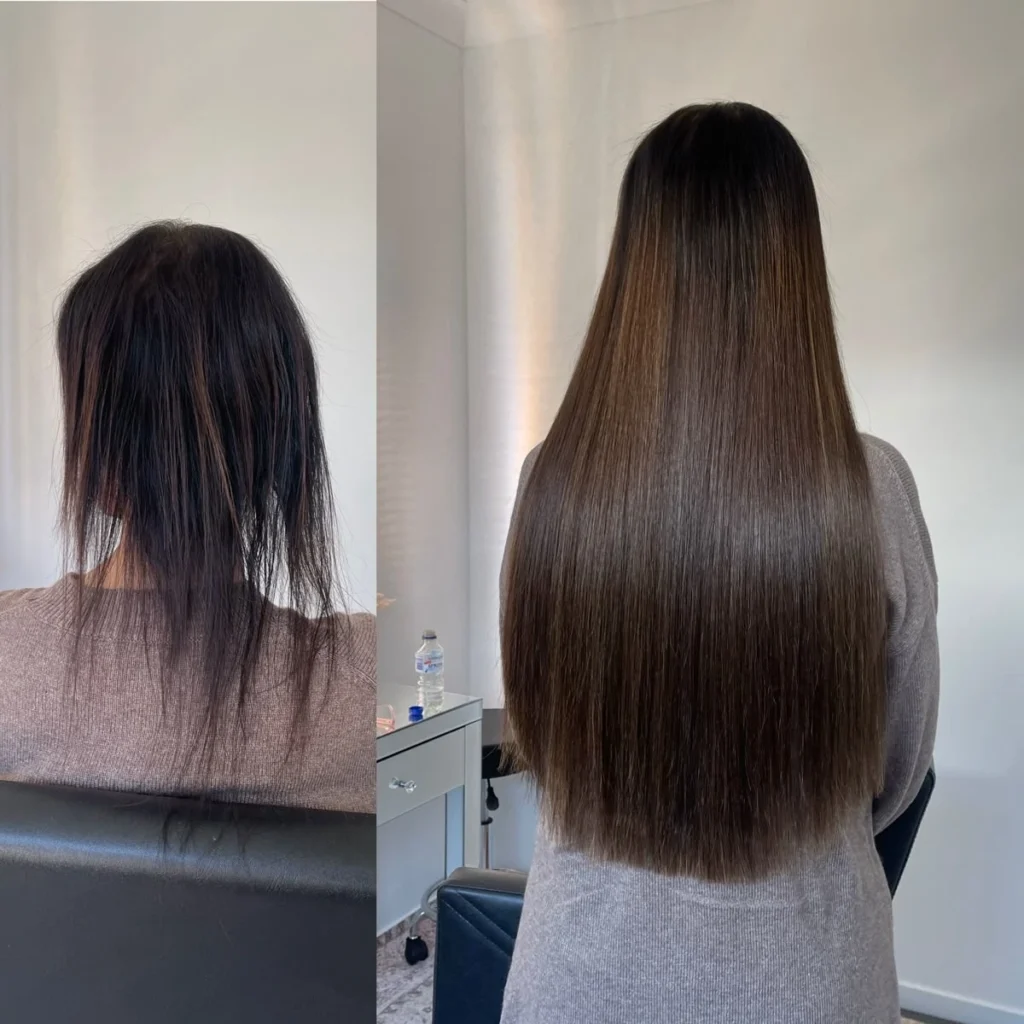
Invisible Bead Extensions, often shortened to IBE, have quickly become a favorite for clients who want a damage-free, heat-free way to add length and volume. Because the method skips glue, keratin, and tape entirely, many people search for it specifically when researching gentler extension options, and pricing is usually one of the first questions. What Are Invisible Bead Extensions? IBE from Millionaire Hair Salon uses a thin, wefted track that is looped through a small section of natural hair and secured with a tiny, flat silicone-lined bead, without any heat, glue, or braiding underneath. Because there is no cornrow base or adhesive, the method is considered one of the gentlest on natural hair and scalp, and the beads themselves are designed to sit flush against the head so they are not visible or felt once styled. How Much Do Invisible Bead Extensions Cost in the USA? Nationally, a full IBE application typically costs between $500 and $1,800, with most clients paying in the $700 to $1,200 range for a standard, natural-looking result. Pricing is usually structured per row or per weft used, similar to other beaded methods, so adding volume or length in additional rows increases the total cost. Move-up appointments to reposition the beads as hair grows are generally priced lower than the initial install, often falling between $100 and $300. What Factors Affect the Cost? ● Number of wefts/rows – More rows mean more coverage and volume, which raises both hair and labor costs. ● Hair length – Extensions in the 18 to 22 inch range typically cost more than shorter lengths due to the amount of hair used. ● Hair quality – Ethically sourced, single-donor Remy hair costs more than lower-grade blends but blends more naturally and lasts longer. ● Stylist training – IBE requires specific technique training, and certified specialists may charge more per session than general stylists. ● Location – Salon pricing varies by city and regional cost of living, though the technique itself is fairly consistent nationwide. What Is Included in the Price? Most IBE pricing includes a consultation, the wefted extension hair, the bead installation itself, and a blending cut and style so the finished look is seamless. Because IBE requires no heat tools or adhesive, install appointments can sometimes be faster than fusion methods, though pricing is generally comparable once hair quality is factored in. How Long Do Invisible Bead Extensions Last? The extensions themselves can last from six months up to a year or longer with proper care, and because the method does not use heat or adhesive, the hair tends to stay in excellent, reusable condition between applications. This can make IBE a cost-efficient option over time, since the same wefts can often be reinstalled at future appointments. How Often Do You Need Maintenance? Most clients need a move-up appointment every six to ten weeks, slightly less frequently than some other bead-based methods, since the beads used in IBE are designed to sit securely without loosening as quickly. Staying on schedule prevents the beads from sliding too far down and causing matting near the ends. Is Invisible Bead Extension Worth the Cost? It is also worth comparing IBE against other beaded methods, such as microlinks or traditional weft-and-bead systems, which sometimes rely on visible metal beads or braided tracks. Because IBE beads sit flatter and are designed to disappear into the hair, many clients find the slightly higher price justified by the improved comfort and more natural appearance, especially for those who wear their hair up or in sleek styles frequently. For clients specifically looking for a heat-free, glue-free, and low-damage extension method, IBE is often considered one of the better investments available, particularly for those with sensitive scalps or hair that has been previously damaged by chemical processing. The gentler application can also mean less strain on natural hair over repeated maintenance visits compared to bonded methods. How to Choose the Right Salon? ● Confirm the stylist is specifically trained and certified in the invisible bead method, not simply beaded extensions in general ● Ask to see close-up photos of the bead placement on real clients to check for visibility and comfort ● Get a clear price breakdown covering hair cost, number of rows, and future move-up pricing ● Discuss your natural hair density honestly so the stylist can recommend the right amount of hair for a natural, undetectable result Tips to Save on Invisible Bead Extension Costs ● Choose a row count that matches your natural density rather than over-ordering hair you do not need for a natural look. ● Stay consistent with move-up appointments, since IBE beads that slip too far down can be harder and more time-consuming to correct. ● Ask your stylist about caring for the wefts between visits so they remain in good enough condition to reuse at your next appointment. ● Get quotes from a couple of certified IBE stylists, since pricing and technique quality can vary even within the same city. FAQs About Invisible Bead Extension Cost Is IBE more expensive than tape-in extensions? Pricing is often comparable, though IBE can sometimes cost slightly more due to the specialized training required and the finer, more time-intensive bead placement. Can I swim or exercise with invisible bead extensions? Yes, since there is no adhesive or heat bond involved, many clients find IBE holds up well to an active lifestyle, though it is still best to follow your stylist’s specific aftercare guidance. Do invisible bead extensions work on short hair? IBE can often be applied to shorter hair more successfully than some other methods since the beads sit close to the scalp, but a consultation is important to confirm your hair length and density can support it. How much hair is typically needed for a full head? Most full-head applications use three to five wefts depending on desired volume, which a stylist will determine based on your natural hair and goals. Will invisible bead extensions damage fine hair? When properly installed and maintained on schedule, IBE is
How Much Do Hand-Tied Hair Extensions Cost ?
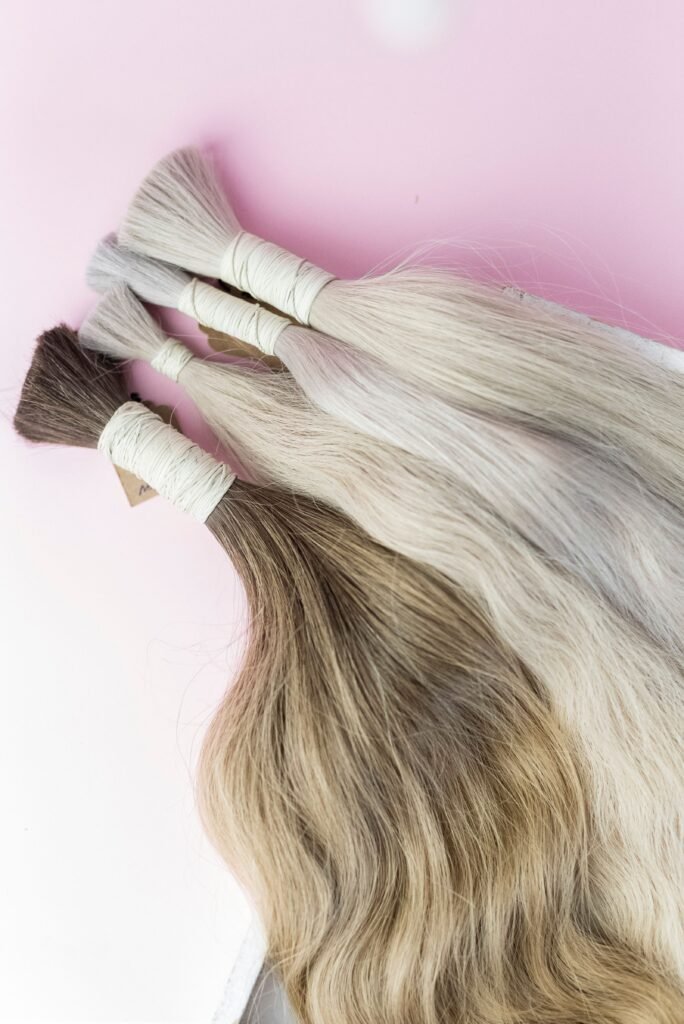
Hand-tied hair extensions have become one of the most requested methods in the U.S. thanks to their flat, natural-looking wefts and gentler application. If you are shopping around for pricing, it helps to understand exactly what drives the cost before you sit down for a consultation. What Are Hand-Tied Hair Extensions? Hand-tied extensions are wefts of hair that are hand-sewn, strand by strand, onto a fine track. Unlike machine-made wefts, hand-tied wefts lie flatter against the scalp, which makes them easier to disguise and generally more comfortable to wear. They are attached using a beaded row method, where small silicone-lined beads clamp the weft to a section of your natural hair without heat, glue, or chemicals. How Much Do Hand-Tied Extensions Cost in the USA? Across the country, a full head of hand-tied extensions typically costs between $800 and $3,000. Most clients land somewhere in the $1,200 to $2,000 range for a first-time install using two to four rows of wefts. Because hand-tied extensions are usually sold in “rows,” pricing often breaks down per row, with each row costing roughly $150 to $400 depending on hair quality and length. Move-up appointments, which are required roughly every six to eight weeks, generally cost less than the original install, often between $150 and $350. What Factors Affect the Cost? ● Number of rows – More rows create more volume and length but increase both hair and labor costs. ● Hair length and quality – Longer, thicker Remy or premium hair bundles cost more per row than shorter, lighter options. ● Salon certification – Hand-tied methods (such as popular industry systems) require specific certification, and certified stylists often charge a premium for their training. ● Geographic market – Extension pricing in larger cities and affluent suburbs tends to run higher than in smaller towns. ● Move-up frequency – Clients who stretch out appointments longer than recommended may need more corrective work, which can add cost over time. What Is Included in the Price? A typical hand-tied extension quote covers the consultation, the wefted hair itself, the beaded installation, and a cut and blend to match your natural hair so the extensions look seamless. Because hand-tied wefts need to be custom cut into your hair shape, the finishing cut is a core part of the service rather than an optional add-on. How Much Does It Cost by Salon Level? Entry-level or newly certified stylists may charge closer to the lower end of the national range, while master-level or platform artists trained in advanced hand-tied systems often charge toward the top of the range or above it, reflecting both their experience and demand. Choosing a more experienced stylist can mean a higher price tag but often results in a flatter, more comfortable, and longer-lasting application. How Long Do Hand-Tied Extensions Last? The wefts themselves, if well cared for, can last one to two years with proper maintenance, since the hair can be moved down and reused as it grows out. This makes hand-tied extensions a strong long-term investment compared to methods where the hair is discarded more quickly. How Often Do You Need Maintenance? Move-ups are typically needed every six to eight weeks to reposition the beaded rows closer to the scalp as your natural hair grows. Regular maintenance not only keeps the extensions comfortable, it also protects your natural hair from tension or matting near the root. Is Hand-Tied Worth the Cost? Many clients also weigh hand-tied extensions against sew-in or clip-in alternatives when deciding where to invest. While clip-ins offer a lower upfront cost, they require daily application and removal, and sew-ins can add bulk at the tracks. Hand-tied wefts strike a middle ground: a higher initial cost balanced by comfort, reusability, and a natural finish that holds up through regular washing, styling, and even swimming with the right aftercare routine. Hand-tied extensions from Millionaire Hair Salon tend to sit at a higher price point than clip-ins but are often considered one of the more comfortable, natural-looking, and reusable methods available. Because the wefts lie flat and the beads do not use heat or adhesive, many clients find this method gentler on natural hair over the long run. For anyone planning to wear extensions consistently for a year or more, the cost per wear often becomes very reasonable once you factor in reuse. How to Choose the Right Salon? When comparing salons for hand-tied extensions, look for: ● Certification in a recognized hand-tied weft system ● A portfolio showing flat, undetectable rows on real clients ● A clear breakdown of hair cost, install cost, and future move-up pricing ● A consultation that assesses your natural hair density to recommend the right number of rows Be cautious of pricing that seems unusually low, since it may signal lower-quality hair or an inexperienced installer, both of which can affect how natural the final result looks. Tips to Save on Hand-Tied Extension Costs ● Start with fewer rows if you are new to extensions, and add more later once you know how much volume you actually want. ● Keep move-up appointments on schedule, since stretching them out can lead to tangling that shortens the life of your wefts. ● Ask whether your salon offers loyalty pricing or bundled packages for repeat maintenance visits, which can lower your cost over a year of wear. ● Invest in proper aftercare products, since well-maintained wefts can be reused for longer, reducing how often you need to purchase new hair. FAQs About Hand-Tied Hair Extension Cost How many rows do I need for a full head? Most clients need two to four rows depending on their natural hair density and desired volume. A stylist can recommend the right number during a consultation. Are hand-tied extensions cheaper than tape-ins over time?
How Much Do K-Tip Hair Extensions Cost ?
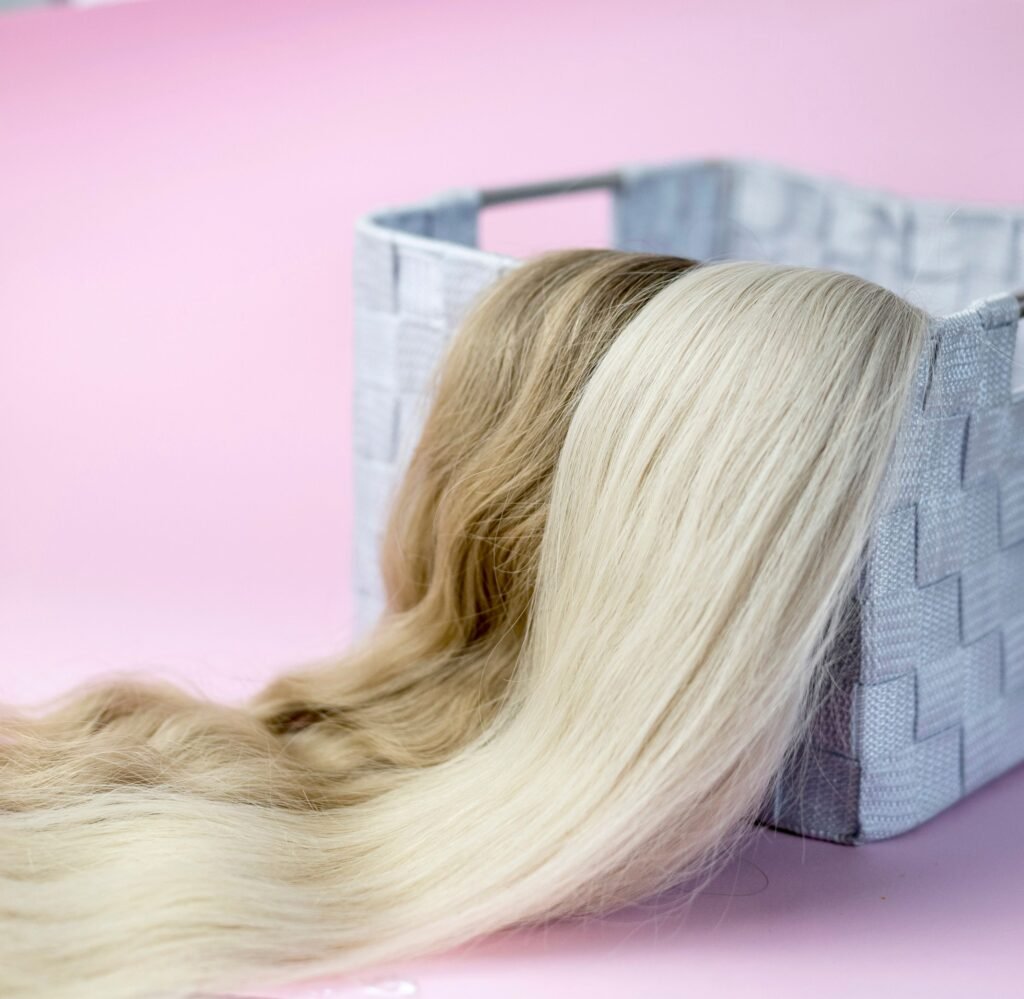
If you have been researching ways to add length or volume to your hair, chances are K-tip extensions have come up in your search. Also called keratin-tip or fusion-style pre-bonded extensions, K-tip strands are fused to your natural hair using a heated keratin bond, giving a seamless, long-lasting result. But before booking, most clients want one answer first: what will it actually cost? What Are K-Tip Hair Extensions? K-tip extensions from Millionaire Hair Salon are individual strands of human hair capped with a small keratin bond at the top. A stylist uses a heating tool to melt the keratin and fuse each strand close to the scalp, section by section. Because the attachment points are so small, K-tips blend naturally into fine or thick hair alike and can be styled, parted, and worn up without the bonds showing. How Much Do K-Tip Hair Extensions Cost in the USA? Nationally, K-tip hair extensions typically cost between $600 and $2,500 for a full head, with most clients paying somewhere in the $800 to $1,500 range. A partial set for extra volume can run lower, closer to $400 to $800, while clients wanting maximum length and density with premium Remy or Russian hair can spend $2,000 or more. This price usually reflects two combined costs: the hair itself (sold by the bundle or by weight) and the labor for installation, which is typically charged separately or bundled into a package price. What Factors Affect the Cost? Several variables influence what you will pay for K-tip extensions: ● Amount of hair used – More bundles are needed for thicker, longer, or fuller results, which raises the total price. ● Hair quality – Remy human hair, especially double-drawn or Russian/European sourced hair, costs more than synthetic blends but lasts longer and looks more natural. ● Hair length – Longer extensions (18 to 24 inches) require more hair per strand and cost more than shorter lengths. ● Stylist expertise – Certified extension specialists often charge more per hour, but their precision reduces damage and improves how the bonds blend. ● Geographic location – Salons in major metro areas or upscale suburbs typically charge more than salons in smaller towns, though quality and training matter more than zip code alone. ● Removal and maintenance visits – Many salons price the initial install separately from move-ups (repositioning bonds as hair grows) and removal. What Is Included in the Price? A typical K-tip quote should include a consultation to match hair color and texture, the extension hair itself, professional installation with a fusion tool, and a basic style-out so you leave with a finished look. Some salons also include a small aftercare kit with sulfate-free shampoo, though this varies by provider, so it is worth confirming before you book. How Long Do K-Tip Extensions Last? With proper care, a single set of K-tip extensions can be worn for three to six months before the bonds need to be moved up as your natural hair grows out. The hair itself, if it is high-quality Remy hair, can often be reused for a second or even third application, which can lower the cost of your next appointment. How Often Do You Need Maintenance? Most clients return every six to eight weeks for a move-up appointment, where the stylist slides the bonds back up closer to the scalp to account for hair growth. Skipping move-ups can cause matting near the roots and put unnecessary strain on natural hair, so sticking to the recommended schedule protects both your investment and your hair health. Is K-Tip Worth the Cost? For clients who want a long-lasting, low-maintenance extension method that can be washed, styled, and slept in without much daily fuss, K-tip extensions are often worth the higher upfront investment compared to clip-ins or tape-ins. The keratin bond method tends to hold up well over months of wear, and because the hair can frequently be reused, the cost per wear often evens out over time. That said, if you are looking for a temporary style for a single event, a lower-commitment option like clip-ins may make more financial sense. How to Choose the Right Salon for K-Tip Extensions Not every salon offers fusion-method extensions, and not every stylist is trained in the technique. When comparing salons, look for: ● Certified training specifically in fusion or K-tip application ● Before-and-after photos of real client transformations ● Transparent pricing that separates hair cost from labor ● A consultation that discusses your hair health and whether K-tip is the right method for your hair type Clients with very fine or fragile hair may be advised toward a gentler method, such as hand-tied wefts or tape-ins, so an honest consultation matters more than a salon simply agreeing to whatever you ask for. Tips to Save on K-Tip Extension Costs ● Ask your stylist whether your current hair can be reused for a second application before buying an entirely new set. ● Book your move-up appointment on schedule rather than waiting, since overdue maintenance sometimes leads to extra corrective work and added cost. ● Consider a partial set if you mainly want volume rather than length, since it uses less hair and lowers the total price. ● Compare quotes from a few certified specialists rather than assuming the cheapest option will deliver the same quality, since poor installation can end up costing more to fix later. FAQs About K-Tip Hair Extension Cost Are K-tip extensions more expensive than tape-ins? K-tip and tape-in extensions are often similarly priced for the hair itself, but labor costs can differ because K-tip installation is more time-intensive, strand by strand, compared to applying pre-taped wefts. Can I reuse my K-tip hair extensions? Yes, in most cases. High-quality Remy hair can typically be reapplied two or three times as long
How Much Do Hand-Tied Hair Extensions Cost ?
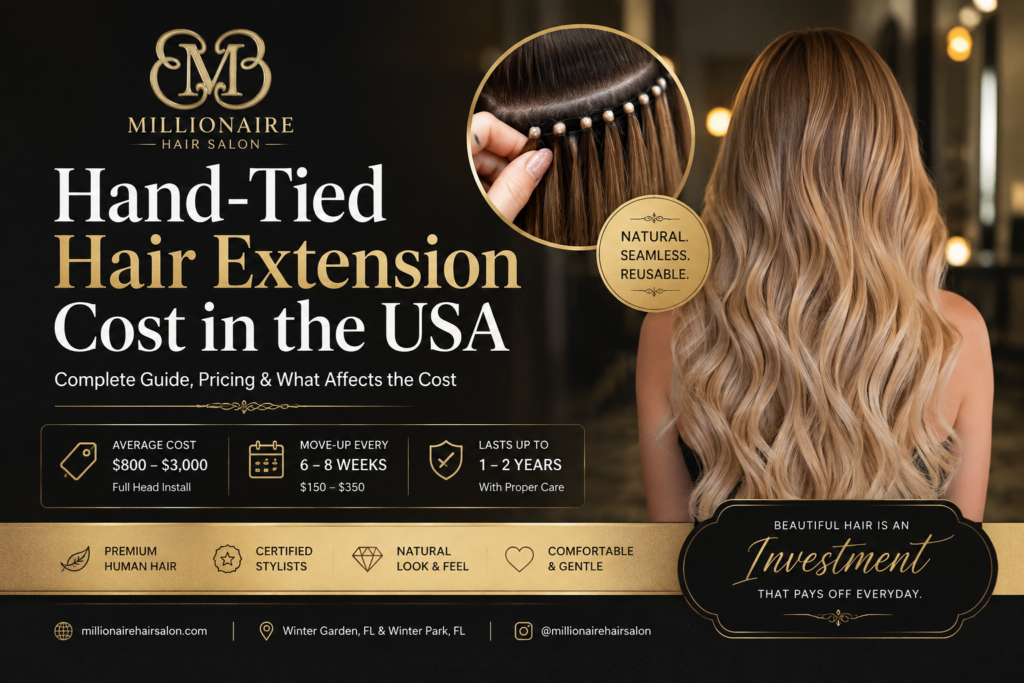
Hand-tied hair extensions have become one of the most requested methods in the U.S. thanks to their flat, natural-looking wefts and gentler application. If you are shopping around for pricing, it helps to understand exactly what drives the cost before you sit down for a consultation. What Are Hand-Tied Hair Extensions? Hand-tied extensions are wefts of hair that are hand-sewn, strand by strand, onto a fine track. Unlike machine-made wefts, hand-tied wefts lie flatter against the scalp, which makes them easier to disguise and generally more comfortable to wear. They are attached using a beaded row method, where small silicone-lined beads clamp the weft to a section of your natural hair without heat, glue, or chemicals. How Much Do Hand-Tied Extensions Cost in the USA? Across the country, a full head of hand-tied extensions typically costs between $800 and $3,000. Most clients land somewhere in the $1,200 to $2,000 range for a first-time install using two to four rows of wefts. Because hand-tied extensions are usually sold in “rows,” pricing often breaks down per row, with each row costing roughly $150 to $400 depending on hair quality and length. Move-up appointments, which are required roughly every six to eight weeks, generally cost less than the original install, often between $150 and $350. What Factors Affect the Cost? ● Number of rows – More rows create more volume and length but increase both hair and labor costs. ● Hair length and quality – Longer, thicker Remy or premium hair bundles cost more per row than shorter, lighter options. ● Salon certification – Hand-tied methods (such as popular industry systems) require specific certification, and certified stylists often charge a premium for their training. ● Geographic market – Extension pricing in larger cities and affluent suburbs tends to run higher than in smaller towns. ● Move-up frequency – Clients who stretch out appointments longer than recommended may need more corrective work, which can add cost over time. What Is Included in the Price? A typical hand-tied extension quote covers the consultation, the wefted hair itself, the beaded installation, and a cut and blend to match your natural hair so the extensions look seamless. Because hand-tied wefts need to be custom cut into your hair shape, the finishing cut is a core part of the service rather than an optional add-on. How Much Does It Cost by Salon Level? Entry-level or newly certified stylists may charge closer to the lower end of the national range, while master-level or platform artists trained in advanced hand-tied systems often charge toward the top of the range or above it, reflecting both their experience and demand. Choosing a more experienced stylist can mean a higher price tag but often results in a flatter, more comfortable, and longer-lasting application. How Long Do Hand-Tied Extensions Last? The wefts themselves, if well cared for, can last one to two years with proper maintenance, since the hair can be moved down and reused as it grows out. This makes hand-tied extensions a strong long-term investment compared to methods where the hair is discarded more quickly. How Often Do You Need Maintenance? Move-ups are typically needed every six to eight weeks to reposition the beaded rows closer to the scalp as your natural hair grows. Regular maintenance not only keeps the extensions comfortable, it also protects your natural hair from tension or matting near the root. Is Hand-Tied Worth the Cost? Many clients also weigh hand-tied extensions against sew-in or clip-in alternatives when deciding where to invest. While clip-ins offer a lower upfront cost, they require daily application and removal, and sew-ins can add bulk at the tracks. Hand-tied wefts strike a middle ground: a higher initial cost balanced by comfort, reusability, and a natural finish that holds up through regular washing, styling, and even swimming with the right aftercare routine. Hand-tied extensions from Millionaire Hair Salon tend to sit at a higher price point than clip-ins but are often considered one of the more comfortable, natural-looking, and reusable methods available. Because the wefts lie flat and the beads do not use heat or adhesive, many clients find this method gentler on natural hair over the long run. For anyone planning to wear extensions consistently for a year or more, the cost per wear often becomes very reasonable once you factor in reuse. How to Choose the Right Salon? When comparing salons for hand-tied extensions, look for: ● Certification in a recognized hand-tied weft system ● A portfolio showing flat, undetectable rows on real clients ● A clear breakdown of hair cost, install cost, and future move-up pricing ● A consultation that assesses your natural hair density to recommend the right number of rows Be cautious of pricing that seems unusually low, since it may signal lower-quality hair or an inexperienced installer, both of which can affect how natural the final result looks. Tips to Save on Hand-Tied Extension Costs ● Start with fewer rows if you are new to extensions, and add more later once you know how much volume you actually want. ● Keep move-up appointments on schedule, since stretching them out can lead to tangling that shortens the life of your wefts. ● Ask whether your salon offers loyalty pricing or bundled packages for repeat maintenance visits, which can lower your cost over a year of wear. ● Invest in proper aftercare products, since well-maintained wefts can be reused for longer, reducing how often you need to purchase new hair. FAQs About Hand-Tied Hair Extension Cost How many rows do I need for a full head? Most clients need two to four rows depending on their natural hair density and desired volume. A stylist can recommend the right number during a consultation. Are hand-tied extensions cheaper than tape-ins over time?
How Much Do K-Tip Hair Extensions Cost ?
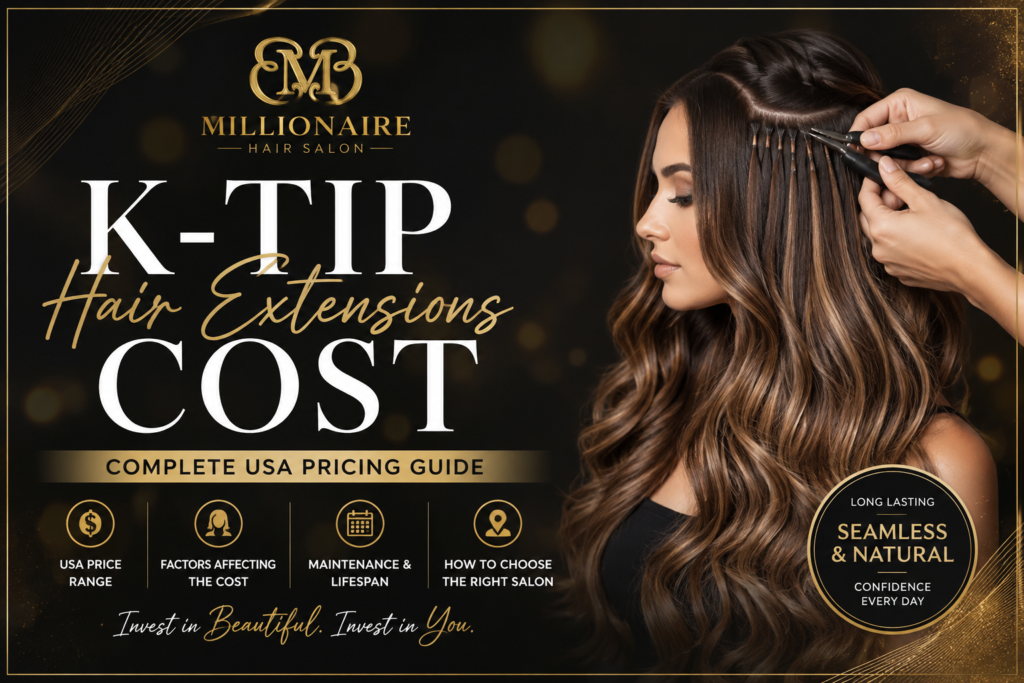
If you have been researching ways to add length or volume to your hair, chances are K-tip extensions have come up in your search. Also called keratin-tip or fusion-style pre-bonded extensions, K-tip strands are fused to your natural hair using a heated keratin bond, giving a seamless, long-lasting result. But before booking, most clients want one answer first: what will it actually cost? What Are K-Tip Hair Extensions? K-tip extensions from Millionaire Hair Salon are individual strands of human hair capped with a small keratin bond at the top. A stylist uses a heating tool to melt the keratin and fuse each strand close to the scalp, section by section. Because the attachment points are so small, K-tips blend naturally into fine or thick hair alike and can be styled, parted, and worn up without the bonds showing. How Much Do K-Tip Hair Extensions Cost in the USA? Nationally, K-tip hair extensions typically cost between $600 and $2,500 for a full head, with most clients paying somewhere in the $800 to $1,500 range. A partial set for extra volume can run lower, closer to $400 to $800, while clients wanting maximum length and density with premium Remy or Russian hair can spend $2,000 or more. This price usually reflects two combined costs: the hair itself (sold by the bundle or by weight) and the labor for installation, which is typically charged separately or bundled into a package price. What Factors Affect the Cost? Several variables influence what you will pay for K-tip extensions: Amount of hair used – More bundles are needed for thicker, longer, or fuller results, which raises the total price. Hair quality – Remy human hair, especially double-drawn or Russian/European sourced hair, costs more than synthetic blends but lasts longer and looks more natural. Hair length – Longer extensions (18 to 24 inches) require more hair per strand and cost more than shorter lengths. Stylist expertise – Certified extension specialists often charge more per hour, but their precision reduces damage and improves how the bonds blend. Geographic location – Salons in major metro areas or upscale suburbs typically charge more than salons in smaller towns, though quality and training matter more than zip code alone. Removal and maintenance visits – Many salons price the initial install separately from move-ups (repositioning bonds as hair grows) and removal. What Is Included in the Price? A typical K-tip quote should include a consultation to match hair color and texture, the extension hair itself, professional installation with a fusion tool, and a basic style-out so you leave with a finished look. Some salons also include a small aftercare kit with sulfate-free shampoo, though this varies by provider, so it is worth confirming before you book. How Long Do K-Tip Extensions Last? With proper care, a single set of K-tip extensions can be worn for three to six months before the bonds need to be moved up as your natural hair grows out. The hair itself, if it is high-quality Remy hair, can often be reused for a second or even third application, which can lower the cost of your next appointment. How Often Do You Need Maintenance? Most clients return every six to eight weeks for a move-up appointment, where the stylist slides the bonds back up closer to the scalp to account for hair growth. Skipping move-ups can cause matting near the roots and put unnecessary strain on natural hair, so sticking to the recommended schedule protects both your investment and your hair health. Is K-Tip Worth the Cost? For clients who want a long-lasting, low-maintenance extension method that can be washed, styled, and slept in without much daily fuss, K-tip extensions are often worth the higher upfront investment compared to clip-ins or tape-ins. The keratin bond method tends to hold up well over months of wear, and because the hair can frequently be reused, the cost per wear often evens out over time. That said, if you are looking for a temporary style for a single event, a lower-commitment option like clip-ins may make more financial sense. How to Choose the Right Salon for K-Tip Extensions Not every salon offers fusion-method extensions, and not every stylist is trained in the technique. When comparing salons, look for: ● Certified training specifically in fusion or K-tip application ● Before-and-after photos of real client transformations ● Transparent pricing that separates hair cost from labor ● A consultation that discusses your hair health and whether K-tip is the right method for your hair type Clients with very fine or fragile hair may be advised toward a gentler method, such as hand-tied wefts or tape-ins, so an honest consultation matters more than a salon simply agreeing to whatever you ask for. Tips to Save on K-Tip Extension Costs ● Ask your stylist whether your current hair can be reused for a second application before buying an entirely new set. ● Book your move-up appointment on schedule rather than waiting, since overdue maintenance sometimes leads to extra corrective work and added cost. ● Consider a partial set if you mainly want volume rather than length, since it uses less hair and lowers the total price. ● Compare quotes from a few certified specialists rather than assuming the cheapest option will deliver the same quality, since poor installation can end up costing more to fix later. FAQs About K-Tip Hair Extension Cost Are K-tip extensions more expensive than tape-ins? K-tip and tape-in extensions are often similarly priced for the hair itself, but labor costs can differ because K-tip installation is more time-intensive, strand by strand, compared to applying pre-taped wefts. Can I reuse my K-tip hair extensions? Yes, in most cases. High-quality Remy hair can typically be reapplied two or three times as long as it is properly cared for between appointments, which can reduce the cost of future visits. Does insurance or financing cover extension costs? Extensions are considered a cosmetic service, so they are not covered by insurance. Many salons do offer payment plans or financing options through
What Is the New Eyebrow Trend? 3 Styles We’re Seeing
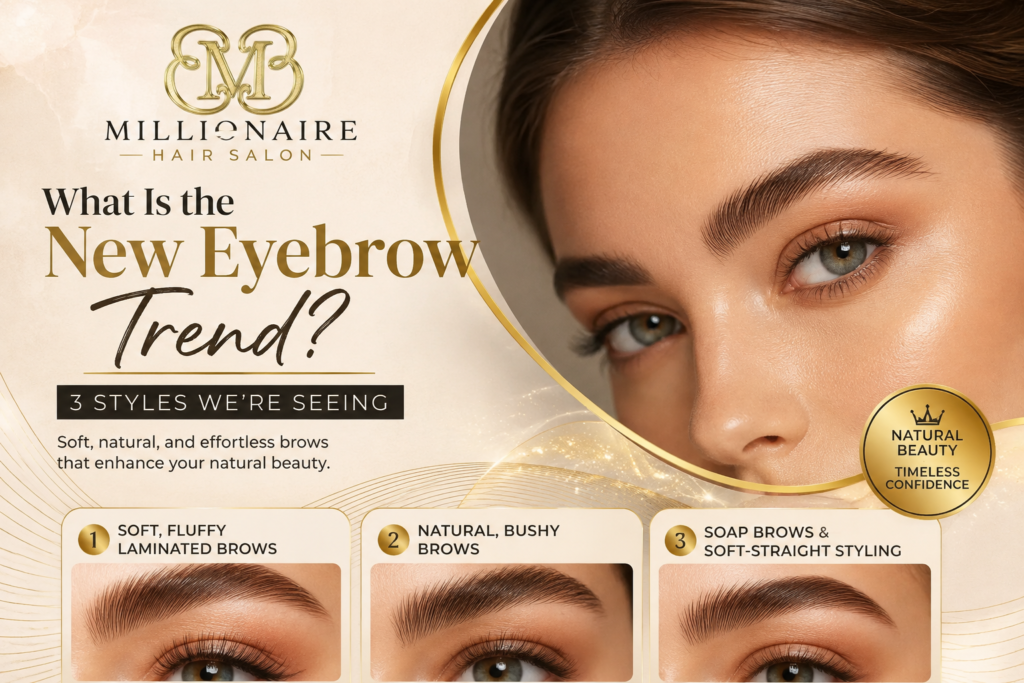
Brow trends have swung dramatically over the years, from the razor-thin arches of the early 2000s to the bold, heavily sculpted Instagram brow that dominated the mid-2010s, followed by the stiff, exaggerated lamination look that peaked a few years ago. This year’s direction marks a clear and welcome shift: less product, more texture, and a genuine emphasis on enhancing what you already have rather than redrawing your face entirely. Here are the three brow styles our clients are requesting most right now, along with how to achieve each one. The Overall Shift: Soft, Natural, and Effortless Before breaking down individual styles, it is worth understanding the broader movement driving this year’s brow trends. The industry has moved decisively away from the extreme, stiffly held lamination that defined recent years, toward what professionals now call soft lamination, texture, and natural fullness. Brows are described by industry educators as fluffy but not overly bold, well-coiffed but far less severe than in past seasons. This shift is credited in part to the continued influence of K-beauty and the broader clean girl aesthetic, both of which favor brows that look well cared for rather than dramatically reshaped. Style One: Soft, Fluffy Laminated Brows Fluffy laminated brows remain the single most requested brow style this year, but the technique itself has evolved. Rather than the rigid, straight-up hold that characterized lamination a few years ago, today’s version favors a softer set that brushes hair upward and outward while still allowing natural movement and texture to show through. The result reads as brushed-up and healthy rather than stiff or overly styled, and it photographs beautifully without looking artificial in person. • Brow lamination typically lasts six to eight weeks with proper aftercare • The finish gives brows a lifted, professionally groomed appearance • Best suited to clients with naturally fuller brows who want definition without heaviness • Requires minimal daily maintenance beyond an occasional brush-through with a spoolie Style Two: Natural, Bushy Brows A strong counter-movement to years of thin, overplucked brows, this year’s trend firmly embraces natural fullness. Runway and editorial coverage has repeatedly showcased thick, textured, minimally groomed brows that frame the eyes without looking over-sculpted, a marked departure from the heavily filled-in, uniform arch that dominated for years. This trend is less about a specific salon technique and more about a mindset shift: allowing natural brow hair to grow in, minimizing over-plucking, and using lightweight products to enhance rather than redraw. • Brow serums are frequently used to support natural growth and thickness • Lightweight, flexible tinted gels fill sparse areas without a heavy, drawn-on look • Minimal shaping preserves natural density rather than removing hair unnecessarily • Pairs well with a professional brow tint for clients wanting a fuller color payoff Style Three: Soap Brows and Soft-Straight Styling Soap brows have remained a favorite for several seasons, but this year’s version leans softer and less exaggerated than earlier iterations. Rather than an extreme, stiffly upward brush, the current styling favors a gentler lift with straighter, more horizontal brow shapes influenced by K-beauty aesthetics. This look is achieved by brushing brow hairs upward and slightly outward using a glycerin-based soap or a lightweight styling wax, giving a fluffy, uniform finish that holds for several hours without the commitment of a semi-permanent treatment. Style Commitment Level Best For Soft, fluffy laminated brows Semi-permanent, lasts 6 to 8 weeks Clients wanting low-effort daily styling with a professional finish Natural, bushy brows No commitment, grown-in and maintained Clients embracing natural texture and minimal daily upkeep Soap brows / soft-straight styling Daily, temporary styling Clients wanting a flexible, changeable look without commitment How to Choose the Right Trend for Your Brows? The right style depends heavily on your natural brow density, your daily styling routine, and how much commitment you want from a treatment. Clients with already fuller, healthy brows often gravitate toward soap brows or natural styling, since there is enough natural hair to work with daily. Clients with sparser or unevenly growing brows tend to see the most transformative results from a soft lamination treatment, which creates the appearance of fullness and uniformity that daily styling alone cannot replicate. What to Avoid This Year? Industry experts are clear that the extreme, stiffly held lamination and heavily over-filled, drawn-on brow shapes of past seasons are firmly on their way out. Over-plucking, in particular, is discouraged across nearly every current trend report, as fuller, natural brows continue to dominate both runway and everyday styling. If you have been considering a heavy, uniform, filled-in brow look, this is a good year to reconsider in favor of something softer and more texture-forward. Maintaining Your Brow Trend at Home Regardless of which style you choose, a few consistent habits help maintain your results between salon visits. Brushing brows upward and outward with a clean spoolie each morning helps maintain a fluffy, lifted shape whether you have had a lamination treatment or are working with your natural hair. A lightweight, flexible brow gel, rather than a heavy, stiff-hold formula, tends to perform better across all three of this year’s leading styles, since flexibility supports movement without looking greasy or weighed down. • Brush brows upward daily with a clean spoolie for a lifted, fluffy finish • Choose lightweight, flexible gels over heavy, stiff-hold formulas • Schedule lamination touch-ups every six to eight weeks to maintain results • Support natural growth with a nourishing brow serum between treatments How This Year’s Trends Compare to Past Brow Eras? Looking back at the evolution of brow trends helps explain why the current direction feels like such a relief to many clients. The pencil-thin arches of the early 2000s required constant, aggressive plucking that many clients now regret, since brow hair does not always grow back fully after years of over-plucking. The bold, heavily sculpted, almost geometric brow that dominated
Can Press-On Nails Damage Your Natural Nails? Truth vs. Myths
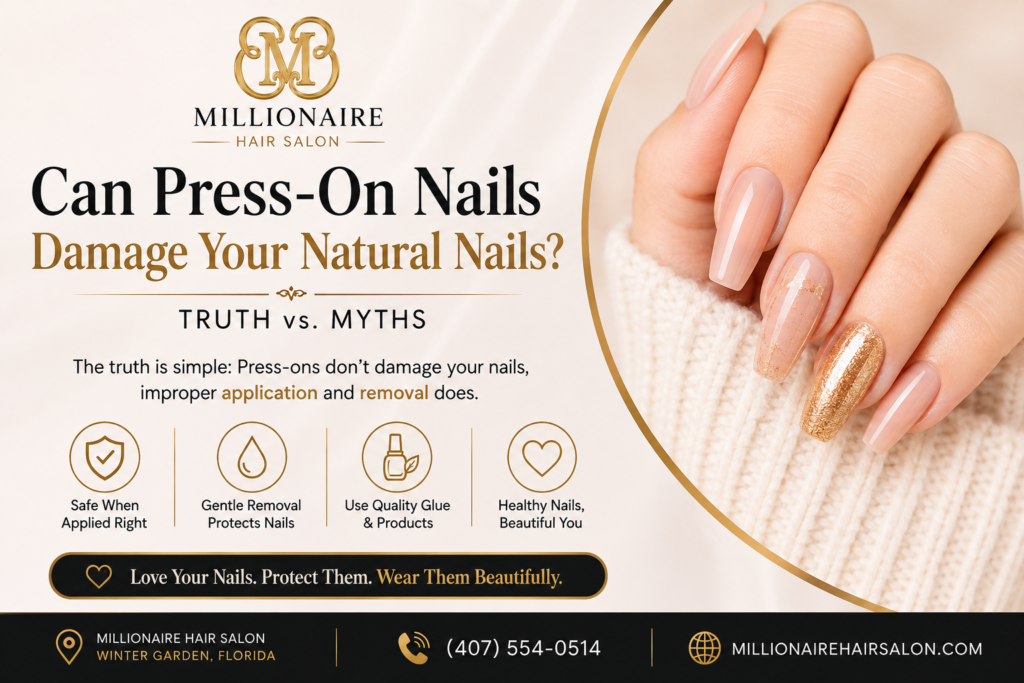
Press-on nails have gone from a quick, temporary fix to a genuine beauty staple, but the debate around whether they damage natural nails has followed them the entire way. As nail professionals, we hear this question constantly, and the honest answer is more nuanced than a simple yes or no. Here is what actually determines whether press-on nails harm your natural nails, separated clearly from the myths that keep circulating. Myth: Press-On Nails Themselves Damage Your Nails The truth is that press-on nails, on their own, do not inherently damage your natural nails. The overwhelming consensus among nail professionals is that damage results almost entirely from how the press-ons are applied and, more importantly, how they are removed, not from wearing them. Nails are made of keratin and do not need to “breathe” the way skin does, so simply covering them with a press-on set for a period of time is not the underlying issue that causes brittleness or thinning. What Actually Causes Damage? Understanding the real causes of press-on nail damage helps you avoid them entirely. The most common culprit is aggressive removal, specifically peeling or prying press-ons off rather than soaking and gently lifting them, which strips away the top layers of the natural nail plate and leaves it thin, rough, or prone to breaking. Low-quality or excessive glue is another significant factor, since cheap adhesives can dry out the nail bed and, when layered on repeatedly, weaken the nail plate over time. Gaps between the natural nail and the press-on, caused by improper application, can also trap water and dirt, creating conditions where fungus or bacteria can develop. Real Cause of Damage Why It Happens How to Prevent It Peeling or prying off press-ons Strips layers of the natural nail plate Always soak and gently lift, never force removal Over-buffing before application Thins the natural nail, making it more vulnerable Lightly smooth the surface only, do not buff aggressively Low-quality or excessive glue Dries out and weakens the nail bed over repeated use Use a gentle, nourishing adhesive and avoid layering excess glue Gaps between nail and press-on Traps moisture and bacteria, risking fungal issues Ensure a precise, well-fitted size for each nail The Right Way to Apply Press-On Nails • Lightly smooth, rather than aggressively buff, the surface of your natural nail • Apply a protective base coat before adding adhesive, when using glue-on styles • Measure each nail carefully against a sizing chart to avoid gaps or pinching • File the sides gently if a press-on is slightly too wide for a custom, secure fit • Avoid water contact for the first one to two hours after application to allow full adhesion Precise sizing matters more than most people realize. A press-on that is too small will pinch and stress the natural nail edge, while one that is too large is more likely to lift, snag, and eventually be pulled off forcefully, which is where most of the real damage occurs. When in doubt, choosing a slightly larger size and gently filing it down for a custom fit tends to produce the safest, most secure result. The Right Way to Remove Press-On Nails Removal technique matters just as much as application, and it is where the vast majority of nail damage actually happens. If glue stickers were used, soaking nails in warm water helps loosen the adhesive gently. For solid glue or UV glue tabs, applying nail polish remover along the edges for a short period softens the bond without force. Once the press-on begins to lift naturally, it can be gently guided off rather than yanked, protecting the top layers of your natural nail plate in the process. • Soak nails in warm water to loosen glue stickers before attempting removal • Apply nail polish remover along the edges for solid glue or UV glue tabs • Wait for the press-on to lift naturally rather than forcing or peeling it off • Massage cuticle oil or a nourishing nail serum into nails immediately after removal • Give natural nails a short rest period between sets to recover fully Signs You Are Using Press-Ons the Healthy Way If your natural nails remain smooth, flexible, and free of noticeable thinning or peeling after removing a set of press-ons, that is a strong sign your application and removal technique is protecting your nail health. Conversely, if you notice increasing brittleness, visible thinning, or peeling layers after repeated use, it is worth reassessing your glue quality, your buffing habits, or your removal method, since these are almost always the real source of the issue rather than the press-ons themselves. Can Press-Ons Actually Protect Your Natural Nails? When applied and removed correctly, press-on nails can function as a protective barrier over your natural nails, shielding them from the everyday wear and tear of typing, cleaning, and general use. This is particularly true for clients who struggle with nail breakage from daily activities, since a well-fitted press-on set covers and protects the natural nail underneath for the duration it is worn. When to Give Your Nails a Rest Even when press-ons are applied and removed correctly, taking occasional breaks between sets allows your natural nails a chance to fully recover, especially if you wear them frequently. Using cuticle oil daily and incorporating a strengthening treatment during these rest periods helps maintain healthy, resilient nails whether you are wearing press-ons, a professional gel set, or going bare. Press-On Nails Compared to Acrylics and Gel Understanding how press-on nails compare to more traditional salon options helps put the damage question into broader context. Acrylics involve a liquid and powder polymer applied and shaped directly onto the natural nail, and removal requires soaking in acetone or careful filing, both of which can weaken the nail plate if not performed correctly by an experienced technician. Gel manicures cure under UV or LED light
The Truth About Cosmetic Brow Tattoo: How Natural Can It Look?
The phrase “brow tattoo” still conjures memories of the harsh, overly dark, uniformly shaped eyebrows that were common decades ago. Modern cosmetic brow tattooing bears almost no resemblance to that outdated image. Between refined pigments, precision tools, and techniques developed specifically to mimic natural brow texture, today’s semi-permanent brow work can look remarkably realistic. Here is an honest, detailed look at how natural cosmetic brow tattooing can actually appear, and what determines whether you end up with soft, believable results or a look that reads as obviously done. The Different Cosmetic Brow Tattoo Techniques “Brow tattoo” is really an umbrella term that covers several distinct techniques, each producing a different finish. Microblading uses a hand-held tool to create fine, individual hair-like strokes, resulting in a soft, textured look that closely mimics natural brow hair. Powder brows, also called ombre brows, use a tattoo machine to deposit pigment in a soft, shaded gradient, similar to the look of brows filled in with powder makeup. Many clients also opt for a hybrid technique that combines hair-stroke detail with soft shading underneath for a fuller, more dimensional result. Technique Finish Best For Microblading Fine, hair-like strokes, soft and textured Naturally sparse brows wanting a realistic, undone look Powder or ombre brows Soft, shaded, gradient finish similar to makeup Oily skin types, those wanting a more defined, filled-in look Hybrid brows Combination of hair strokes and soft shading Clients wanting fullness with added natural texture What Makes a Brow Tattoo Look Natural? The realism of a cosmetic brow tattoo comes down to a combination of factors working together: stroke direction, pigment color, saturation, and how closely the design follows your existing brow pattern. A skilled artist studies the direction your natural hair grows and mirrors that pattern with each individual stroke, rather than applying uniform lines that ignore your unique growth. Pigment color is equally important; a shade that is too dark, too warm, or mismatched to your natural hair color is one of the most common reasons brow tattoos look artificial rather than believable. • Strokes follow your natural hair growth direction rather than a generic pattern • Pigment color is carefully matched to your hair color and skin undertone • Saturation is built gradually, since pigment always appears darker immediately after application • Brow shape is mapped to your unique bone structure rather than a one-size template • Healed results are softer and more muted than the immediate post-appointment appearance The Role of Pigment Selection and Color Theory Choosing the right pigment is far more nuanced than simply matching your hair color. Skilled artists account for how pigment will heal and shift beneath the skin, since color can appear cooler, warmer, or more muted once fully healed compared to how it looks the day of application. Undertone matters enormously here; a pigment with too much warmth can heal with an unwanted reddish or orange cast, while a pigment that is too cool can appear ashy or gray against certain skin tones. This is precisely why an experienced technician spends real time on color consultation before ever picking up a tool. Why Does the Healing Process Change Everything? Immediately after a cosmetic brow tattoo session, the color will look significantly darker and more saturated than the final result. This is normal and expected, not a sign that something has gone wrong. Over the following one to two weeks, the treated area flakes and sheds as part of the natural healing process, and the pigment softens considerably as it settles into its true, healed shade. Clients who judge their results too early, before the healing process has completed, often panic unnecessarily over color or intensity that will look completely different once fully healed. Skin Type and Its Effect on Natural-Looking Results Skin type plays a significant role in which technique will heal most naturally. Oilier skin types tend to cause pigment to diffuse slightly beneath the surface, which can blur fine hair-stroke detail from microblading over time, making powder or ombre techniques a better long-term choice for a crisp, natural-looking finish. Drier or more mature skin, on the other hand, often holds microbladed hair strokes beautifully, since there is less oil production to blur the fine lines. A knowledgeable technician assesses your skin type during consultation and recommends the technique most likely to heal naturally for you specifically, rather than defaulting to whichever method is currently trending. Longevity and How Natural Results Age Over Time Because cosmetic brow tattoos are considered semi-permanent, results gradually soften over one to three years depending on the technique, your skin type, and sun exposure. This gradual fading is actually part of what keeps results looking natural over time; rather than staying starkly defined indefinitely, the color mellows in a way that continues to look intentional rather than harsh. Scheduled touch-up appointments allow your artist to refresh saturation and refine shape before the color fades too much, keeping your brows consistently natural-looking rather than allowing them to fade unevenly. Questions to Ask Before Your Appointment • Can I see healed results from your previous clients, not just fresh, same-day photos? • How do you determine which technique, microblading or powder brows, suits my skin type? • What is your process for color matching and adjusting for how pigment heals? • How many touch-up sessions are typically included, and when should I schedule them? • What sterilization and hygiene protocols do you follow for every client? Asking to see healed results, ideally at the four to six week mark rather than immediately after treatment, is one of the most reliable ways to judge whether a technician consistently delivers natural-looking work. Fresh, same-day photos will almost always look impressive; healed photos tell the real story. Common Regrets and How to Avoid Them Most dissatisfaction with cosmetic brow tattoos traces back to a handful of avoidable decisions made before the appointment
Have Sensitive Skin? You Can Still Wax!
Sensitive skin sends plenty of clients away from waxing and toward less effective hair removal methods out of fear of redness, bumps, or irritation. The good news, backed by both dermatological guidance and professional waxing best practices, is that sensitive skin is not a disqualifier for waxing. It simply requires a more thoughtful approach, from the products used to the technique applied to your aftercare routine. Here is what a truly sensitive-skin-friendly waxing experience looks like, and how to make sure your next appointment leaves you smooth rather than irritated. Why Sensitive Skin Reacts Differently to Hair Removal? Sensitive skin has a naturally weaker barrier function, which means it is more prone to inflammation, redness, and irritation when exposed to friction, heat, or certain ingredients. This is true across almost every hair removal method, not just waxing, but the reaction is often more visible after waxing simply because the treatment is more thorough. The encouraging part is that most of the irritation associated with waxing on sensitive skin comes down to technique and product choice rather than the fundamental process itself. Why Waxing Can Actually Be Better for Sensitive Skin Than Shaving? Because waxing removes hair from the root rather than cutting it at the surface, hair grows back finer and less coarse over time, and many clients notice a meaningful drop in hair density after several consistent sessions. This reduced density means fewer follicles working their way back through the skin, which lowers the long-term risk of ingrown hairs and irritation compared to shaving, which creates blunt-edged hairs that are more prone to curling back into the skin. Regular waxing clients also tend to report less overall irritation over time than those who rely on daily or near-daily shaving. Choosing the Right Wax Formula for Sensitive Skin Not all wax is created equal, and this matters enormously for sensitive skin. Hard wax, which is applied without a strip and removed once it hardens, tends to grip the hair itself rather than the surrounding skin, making it gentler and more effective for sensitive or reactive areas. Look for a salon that specifically uses formulas designed for sensitive skin types and can walk you through what ingredients are in their wax before your appointment. • Ask whether the salon offers a hard wax formulated for sensitive or reactive skin • Request a patch test before your first full appointment if you have a history of reactions • Confirm the salon uses fresh applicators and single-use materials for every client • Mention any skincare products, medications, or recent treatments that may increase sensitivity Preparing Your Skin Before an Appointment Preparation Step Why It Matters Timing Gentle exfoliation Removes dead skin cells so wax grips hair, not skin 24 to 48 hours before waxing Confirm hair length Wax needs roughly a quarter inch of growth to grip effectively Before booking Cleanse the area Removes oils and bacteria that can interfere with wax adhesion Day of appointment Avoid retinoids or acids Reduces risk of over-sensitized, reactive skin 48 hours before waxing Schedule around your cycle Hormonal shifts can heighten sensitivity Mid-cycle when possible Gentle exfoliation in the day or two before your appointment helps the wax grip the hair itself rather than a layer of dead skin cells, which leads to a cleaner pull and less repeated passing over the same area, a major contributor to irritation. It is also worth avoiding strong exfoliating acids or retinoid products in the two days leading up to your appointment, since these can leave skin more reactive than usual. What Happens During a Sensitive-Skin-Friendly Wax? A thoughtful esthetician working with sensitive skin will apply wax in the direction of hair growth and remove it against the grain in one quick, confident motion while holding the skin taut. This technique minimizes trauma to the skin and ensures a clean removal on the first pass, reducing the need to go back over the same area, which is often where irritation compounds. Estheticians experienced with sensitive skin also tend to work in smaller sections, allowing better control and a gentler overall experience. Aftercare That Prevents Irritation and Ingrown Hairs The hours immediately following a wax matter as much as the service itself. Heat, moisture, and friction are the three biggest irritants for freshly waxed, sensitive skin, since they can increase blood flow and inflammation in an area that is already sensitized. Avoiding intense workouts, hot showers, saunas, and tight clothing for at least a day after your appointment gives your skin the space it needs to calm down and heal properly. • Stick to lukewarm water and avoid saunas or steam rooms for 24 hours • Skip intense workouts the day of your appointment to reduce sweat and friction • Wear loose, breathable clothing over freshly waxed areas • Apply a soothing, fragrance-free moisturizer or aloe-based gel • Begin gentle exfoliation again after 48 hours to help prevent ingrown hairs • Avoid touching the treated area to minimize the risk of bacteria transfer Common Waxing Myths for Sensitive Skin, Debunked A great deal of hesitation around waxing for sensitive skin stems from outdated information or a single bad past experience rather than the treatment itself. One persistent myth is that sensitive skin will always react badly to waxing, when in reality most reactions trace back to low-quality wax, rushed technique, or skipping proper aftercare rather than an inherent incompatibility. Another common misconception is that more frequent waxing worsens sensitivity over time; in truth, many clients find their skin becomes progressively less reactive with consistent, properly spaced sessions, as hair grows back finer and follicles become less prone to irritation. A third myth worth addressing directly is the belief that numbing creams or over-the-counter pain relievers are necessary to make waxing tolerable for sensitive skin. While some clients do choose to use a gentle topical numbing product, a skilled esthetician